Your form has been submitted. We'll contact you in 24 hours.
Close
Home/Blog/Step-by-step installation and configuration of proxy paige
Step-by-step installation and configuration of proxy paige
PYPROXY·Jun 11, 2025
In the digital age, privacy and security are paramount concerns for many users. Proxy Paige offers a reliable solution to help users manage online anonymity, bypass geographical restrictions, and safeguard their browsing activities. This article will provide a comprehensive guide on installing and configuring Proxy Paige. Whether you're new to proxy tools or looking for advanced configuration methods, this step-by-step breakdown will help you get started and ensure a seamless experience. From installation prerequisites to advanced configurations, we cover every aspect to help you harness the full potential of Proxy Paige.
Understanding Proxy Paige: An Overview
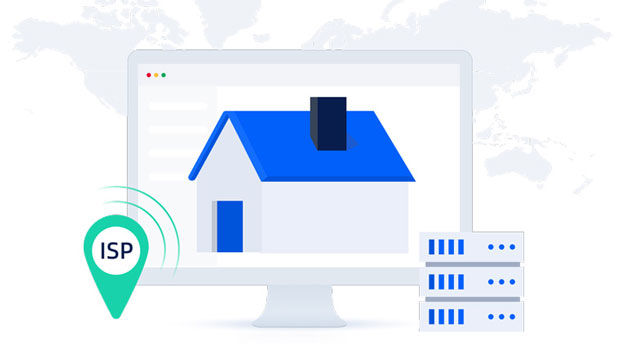
Proxy Paige is a versatile tool that allows users to mask their IP address and route internet traffic through proxy servers. This helps protect your online identity and allows you to bypass restrictions that may be in place in certain regions. It is designed to support various types of proxy configurations, such as HTTP, HTTPS, and SOCKS proxies. Proxy Paige is widely used by individuals who value privacy and by businesses that need to secure their networks against unwanted intrusion or surveillance. By implementing Proxy Paige, users gain greater control over their digital footprint while enjoying unrestricted access to global content.
Pre-Installation Requirements
Before proceeding with the installation of Proxy Paige, there are several prerequisites that users must meet. Ensuring that your system is compatible with the software and understanding the configuration process is critical for a smooth installation. Here are the key points to keep in mind:
1. System Requirements: Ensure your device meets the minimum system specifications needed to run Proxy Paige. This typically includes an operating system such as Windows, macOS, or Linux, along with a stable internet connection.
2. Permissions: During installation, administrative rights might be required on your system. Make sure you have the necessary permissions to install and configure software on your device.
3. Proxy Server Information: You will need to have access to a valid proxy server (either private or public) to configure Proxy Paige effectively. This could include details such as the server's IP address, port number, and any authentication credentials if needed.
Step-by-Step Installation Process
The installation of Proxy Paige is relatively simple and can be completed in a few key steps. Below, we break down the installation process for different operating systems.
1. Download the Software: Start by downloading the latest version of Proxy Paige from a trusted source. Ensure that the version you download is compatible with your operating system.
2. Launch the Installer: Once the download is complete, open the installer file. Follow the on-screen instructions, and accept the terms and conditions when prompted.
3. Select Installation Preferences: During installation, you may be prompted to choose installation settings such as the installation directory. You can choose the default settings or customize them based on your preferences.
4. Complete Installation: After selecting your preferences, proceed with the installation. The software will install on your device, and once completed, you will see a confirmation message.
5. Restart Your Device: In some cases, it may be necessary to restart your device to finalize the installation process.
Initial Configuration of Proxy Paige
Once the installation is complete, you can begin configuring Proxy Paige to suit your needs. Follow these steps for a basic configuration:
1. Launch the Application: Open Proxy Paige from your desktop or application folder.
2. Enter Proxy Server Information: You will be prompted to enter the proxy server details. This typically includes the IP address, port number, and any necessary authentication information (e.g., username and password). Ensure you have this information on hand.
3. Choose Proxy Type: Proxy Paige supports various types of proxies, including HTTP, HTTPS, and SOCKS. Select the proxy type that corresponds to your server's configuration.
4. Enable Encryption (Optional): If desired, you can enable SSL/TLS encryption to secure your connection. This is particularly useful when dealing with sensitive information.
5. Test Connection: After entering all the required details, test the connection to ensure that Proxy Paige is working correctly. You can do this by attempting to access a website and checking if the proxy is functioning as expected.
Advanced Configuration and Troubleshooting
For users who need more advanced configurations or encounter issues, there are several options available:
1. Custom Proxy Rules: Proxy Paige allows users to create custom rules for different types of traffic. For example, you may want to route certain websites through one proxy server and others through a different one. These custom rules can be configured through the settings menu.
2. Authentication Settings: If your proxy server requires additional authentication, ensure that you configure the correct method (e.g., basic or digest authentication) in the settings. This will ensure seamless access without frequent login prompts.
3. DNS and IP Routing: Advanced users may choose to configure DNS settings or IP routing to further control the flow of internet traffic through the proxy. This is often required in corporate environments where network security is a priority.
4. Troubleshooting: If you experience connectivity issues, verify the following:
- Check that the proxy server is online and accessible.
- Ensure the proxy credentials are correct.
- Test the connection with a different proxy server to rule out issues with your current server.
5. Logs and Error Reports: In case of issues, review the logs and error reports provided by Proxy Paige. These can provide valuable insights into what might be causing connection failures and how to resolve them.
Security Considerations and Best Practices
While Proxy Paige provides enhanced privacy and security, it's important to follow best practices to maximize protection:
1. Use Reliable Proxy Servers: Always use reputable proxy servers to ensure your data is secure. Avoid free proxies, as they may compromise your privacy.
2. Enable HTTPS: Always enable HTTPS when possible to encrypt data transmission and protect sensitive information.
3. Regularly Update Proxy Paige: Keep Proxy Paige up to date with the latest security patches and feature updates. This helps protect against potential vulnerabilities.
4. Monitor Connection Logs: Regularly monitor connection logs to detect any unusual activity or unauthorized access attempts.
Configuring Proxy Paige is a straightforward process that provides significant privacy and security benefits. Whether you're using it for personal privacy, bypassing content restrictions, or securing business communications, the steps outlined above will ensure you set up Proxy Paige effectively. Remember to follow the installation and configuration steps carefully, and always adhere to best practices to maximize your online protection. With Proxy Paige properly installed and configured, you can enjoy a safer, more private internet experience.