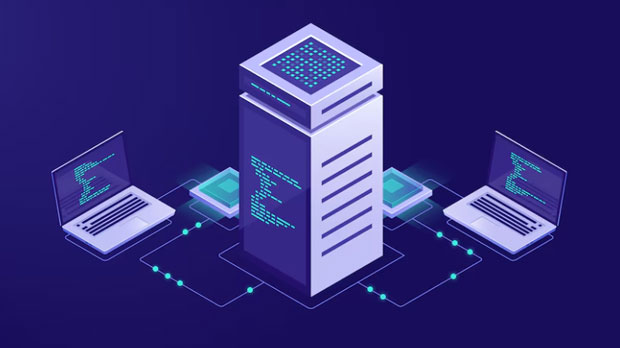
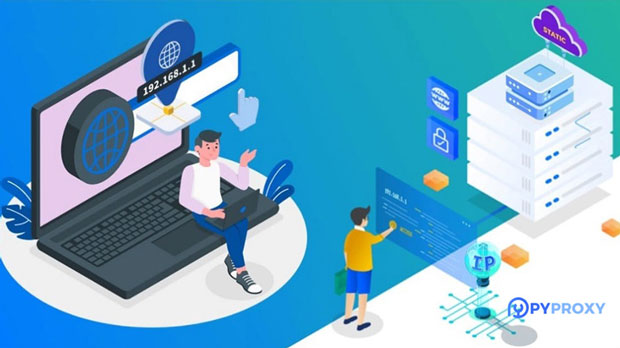
Product
Pricing
arrow
Get Proxies
arrow
Use Cases
arrow
Locations
arrow
Help Center
arrow
Program
arrow
pyproxy
Email
pyproxy
Enterprise Service
menu
pyproxy
Email
pyproxy
Enterprise Service
Submit
pyproxy Basic information
pyproxy Waiting for a reply
Your form has been submitted. We'll contact you in 24 hours.
Close
Home/ Blog
blog

The Potential Impact and Challenges of Quantum Encryption Technology on Proxy IP Security

Quantum encryption technology has made significant strides in recent years, promising to revolutionize data protection and security systems. As proxy ip services are increasingly used for privacy protection and data masking, understanding the potential impact of quantum encryption on their security is crucial. Quantum encryption leverages the principles of quantum mechanics to enhance cryptography, making traditional encryption methods more vulnerable to breaches. This article delves into how quantum encryption might influence the security of proxy ips, examining both the positive potential and the challenges it poses for future privacy strategies. Introduction to Quantum Encryption and Proxy IP SecurityIn the world of digital security, proxy IPs serve as an essential tool to mask a user's real IP address and provide privacy online. However, the increasing sophistication of cyberattacks and the rise of quantum computing pose new challenges. Quantum encryption technology, which uses quantum keys and quantum entanglement to encrypt data, holds the potential to transform security measures across industries, including proxy IP services.Quantum encryption works on the premise that observing a quantum system disturbs its state, thereby preventing eavesdropping. This could theoretically make communication systems much more secure. However, the rapid development of quantum computing brings a new set of risks to traditional cryptographic techniques, including the encryption methods used by proxy IP services.Impact of Quantum Encryption on Proxy IP SecurityQuantum encryption presents both promising opportunities and substantial risks for the security of proxy IPs.1. Increased Resistance to Conventional Attacks: The implementation of quantum encryption could enhance the security of proxy IP services against conventional hacking attempts. Classical encryption algorithms, such as RSA or AES, rely on computational difficulty for their security. However, quantum computers could break these algorithms by using quantum algorithms like Shor’s algorithm, making traditional encryption methods obsolete. Quantum encryption provides a higher level of resistance against such breaches by using quantum key distribution (QKD) to ensure secure key exchanges.2. Real-Time Security in Proxy IP Networks: One of the major advantages quantum encryption brings to proxy IP security is the ability to establish real-time, unbreakable secure connections. The ability to detect tampering during the key exchange process enables more immediate response to potential attacks, ensuring that the encrypted connection remains intact.3. Future-Proofing Proxy IP Services: With the advent of quantum computing, proxy IP services need to evolve to meet these emerging threats. Quantum encryption could provide a long-term solution to safeguard proxy IP networks, offering encryption methods that are more resilient to quantum decryption techniques. By adopting quantum-resistant algorithms, proxy IP services could effectively mitigate the risks posed by quantum computers, ensuring continued user privacy in the future.Challenges in Integrating Quantum Encryption with Proxy IP SecurityDespite the advantages, several challenges exist when integrating quantum encryption into the existing infrastructure of proxy IP services.1. Cost and Complexity of Quantum Encryption Implementation: One of the primary barriers to quantum encryption is the cost and technical complexity of implementing quantum cryptography systems. Unlike traditional encryption, quantum encryption requires advanced hardware to generate and distribute quantum keys. The current infrastructure of proxy IP providers may not be equipped to handle this level of sophistication, leading to higher implementation costs and the need for significant technological upgrades.2. Limited Availability of Quantum Infrastructure: Quantum encryption relies heavily on the availability of quantum communication infrastructure, which is not yet widely accessible. Quantum key distribution, for instance, requires specialized equipment and infrastructure to operate effectively. Proxy IP services may find it challenging to incorporate quantum encryption into their systems if such infrastructure is not readily available or affordable.3. Interoperability Issues with Existing Cryptographic Protocols: Another challenge is the potential incompatibility between quantum encryption systems and the traditional cryptographic protocols already in use. Many existing proxy IP services use conventional encryption methods that may not be compatible with quantum encryption. This could result in operational inefficiencies and the need for significant upgrades to the security architecture of proxy IP networks.4. Quantum-Specific Security Concerns: While quantum encryption promises to be more secure than classical methods, it is not entirely immune to risks. For instance, quantum systems could be susceptible to new forms of attack that exploit the peculiarities of quantum mechanics. Additionally, the generation and distribution of quantum keys require a high level of precision, and any errors in the process could compromise the integrity of the entire encryption system.The Future of Proxy IP Security in the Quantum EraLooking ahead, the integration of quantum encryption into proxy IP services offers great potential for strengthening privacy and security. As quantum computing continues to evolve, it is likely that hybrid systems, which combine both classical and quantum encryption methods, will emerge to address the challenges and limitations of each approach.1. Development of Quantum-Resistant Protocols: Researchers are already working on developing quantum-resistant cryptographic protocols that could be integrated with existing proxy IP services. These protocols would enable proxy IP providers to safeguard their users from both classical and quantum-based threats, ensuring comprehensive protection in the post-quantum era.2. Collaborative Efforts between Quantum and Cybersecurity Experts: The successful integration of quantum encryption into proxy IP security will require collaboration between quantum physicists, cybersecurity experts, and industry leaders. By working together, they can create robust encryption systems that are not only quantum-safe but also scalable and cost-effective for large-scale use.3. Long-Term Sustainability of Proxy IP Services: As the world moves toward a quantum future, it is crucial for proxy IP providers to stay ahead of emerging trends and technological advancements. Adopting quantum encryption early on could offer a competitive advantage in the cybersecurity market, positioning these services as secure, future-proof solutions for users concerned with privacy.Quantum encryption technology presents both significant opportunities and challenges for the future of proxy IP security. While it offers enhanced protection against traditional cyber threats and provides a path forward for securing communications in the quantum age, the implementation of this technology in proxy IP networks comes with considerable technical, financial, and infrastructure-related hurdles. However, with continued research, development, and collaboration, quantum encryption could ultimately transform proxy IP security, offering more robust and resilient protection for users in an increasingly digital world.

May 30, 2025

Read story
blog

Deploying a scalable HTTP proxy cluster using Docker

Deploying a scalable HTTP proxy cluster using Docker allows businesses and developers to efficiently manage large amounts of web traffic while ensuring optimal performance and scalability. Docker provides a containerization solution that simplifies the management of the proxy servers in a clustered environment. This approach allows for better resource utilization, easier maintenance, and improved fault tolerance. In this article, we will explore how Docker can be leveraged to deploy a scalable HTTP proxy cluster, its advantages, and the best practices for setting it up and maintaining it effectively. Introduction to HTTP Proxy and DockerAn HTTP proxy is an intermediary server that sits between clients and the web, forwarding client requests to the web servers and returning the responses. The proxy server can provide various benefits such as load balancing, enhanced security, anonymity, and improved performance. It is particularly useful when managing high-volume traffic or when geographical distribution is required.Docker, on the other hand, is a containerization platform that enables applications to run in isolated environments called containers. These containers are lightweight and portable, ensuring that applications can run consistently across different environments. Docker's flexibility allows it to be an excellent choice for deploying scalable HTTP proxy clusters, making it easier to scale, manage, and maintain these clusters.Benefits of Using Docker for HTTP Proxy Clusters1. ScalabilityOne of the key benefits of deploying an HTTP proxy cluster using Docker is scalability. As web traffic increases, businesses need to ensure that their proxy servers can handle the load. Docker makes it easy to scale the proxy cluster horizontally by adding new containers to meet growing demand. Docker Swarm or Kubernetes can manage the orchestration of these containers, ensuring that they are distributed across multiple machines and balanced properly.2. Efficient Resource ManagementDocker containers are lightweight compared to traditional virtual machines, allowing for more efficient use of system resources. This efficiency reduces hardware costs and ensures that the proxy servers run optimally. Docker also offers fine-grained control over resource allocation, such as CPU, memory, and disk space, which is crucial in a high-traffic environment.3. Simplified MaintenanceWith Docker, each proxy server runs in its own isolated container. This isolation simplifies the process of updating and maintaining the system. When an update is required, the affected container can be replaced without impacting the rest of the cluster. Additionally, Docker's built-in versioning system ensures that the correct version of the proxy server is always running.4. Fault Tolerance and High AvailabilityBy deploying multiple proxy servers across different containers, Docker ensures that the system remains highly available even if one or more containers fail. Docker's built-in health checks and monitoring tools can automatically detect failures and restart the affected containers, maintaining the stability of the proxy cluster.5. SecurityDocker provides several security features that enhance the security of the HTTP proxy cluster. Each container runs in an isolated environment, reducing the risk of a security breach affecting the entire system. Additionally, Docker allows for fine-grained control over network configurations, ensuring that sensitive data is protected during transit.Designing a Scalable HTTP Proxy Cluster with Docker1. Choosing the Right Proxy Server SoftwareThe first step in deploying an HTTP proxy cluster is selecting the right proxy server software. There are several options available, including open-source solutions like Squid, HAProxy, and Nginx. Each of these solutions has its own strengths and weaknesses, so it’s important to choose the one that best suits your needs in terms of performance, security, and flexibility.2. Setting Up Docker ContainersOnce the proxy server software is selected, the next step is to set up Docker containers for each instance of the proxy server. Docker provides a simple way to define and configure containers using Dockerfiles. A Dockerfile contains instructions on how to build the container, including installing the proxy server software and configuring it to work with the desired settings.3. Orchestrating the Cluster with Docker Swarm or KubernetesIn order to scale the HTTP proxy cluster, you will need to use an orchestration tool such as Docker Swarm or Kubernetes. These tools manage the deployment, scaling, and monitoring of Docker containers across a cluster of machines. Docker Swarm is easier to set up and is ideal for smaller clusters, while Kubernetes is more powerful and suited for large-scale deployments.4. Configuring Load BalancingTo ensure that traffic is distributed evenly across the proxy servers, load balancing is an essential component of the cluster. Docker makes it easy to set up load balancing with tools like HAProxy or Nginx, which can distribute incoming HTTP requests among multiple proxy server containers based on various algorithms such as round-robin, least connections, or IP hash.5. Monitoring and LoggingEffective monitoring and logging are essential for maintaining the health of the HTTP proxy cluster. Docker provides several monitoring tools, such as Docker stats and third-party tools like Prometheus and Grafana, which allow you to track the performance and resource usage of the containers. Additionally, setting up centralized logging with tools like ELK Stack (Elasticsearch, Logstash, and Kibana) can help you identify and troubleshoot issues in real-time.Best Practices for Maintaining the HTTP Proxy Cluster1. Automate Deployment and ScalingAutomating the deployment and scaling of Docker containers ensures that the proxy cluster can respond to changes in traffic volume without manual intervention. Docker Compose can be used to define multi-container applications, while tools like Jenkins or GitLab CI can automate the process of deploying new containers or updating existing ones.2. Regularly Update and Patch ContainersKeeping the proxy server containers up to date is crucial for security and performance. Regularly checking for updates and patches for the proxy server software and other dependencies will ensure that your system remains secure and efficient.3. Implement Network SegmentationNetwork segmentation is a security best practice that involves dividing the network into smaller subnets. By segmenting the network, you can isolate sensitive components, such as the database or internal services, from the public-facing proxy servers. Docker provides tools to define network policies and ensure secure communication between containers.4. Perform Regular BackupsWhile Docker provides a robust system for managing containers, it is still important to perform regular backups of your configuration files and container data. Backups ensure that you can quickly restore your proxy cluster in case of a failure or disaster.Deploying a scalable HTTP proxy cluster using Docker provides several advantages, including improved scalability, resource management, fault tolerance, and security. By leveraging Docker's containerization capabilities and orchestration tools like Docker Swarm or Kubernetes, businesses can efficiently handle high volumes of web traffic while maintaining optimal performance. Following best practices such as automating deployment, regular updates, and network segmentation ensures the continued success and security of the proxy cluster, making it an invaluable tool for modern web infrastructure.

Jun 03, 2025

Read story
blog

How does Croxy Proxy online proxy support bandwidth for video playback?

Croxy Proxy is a web-based proxy service that allows users to access content from different websites, bypass geographical restrictions, and maintain privacy while browsing the web. One of its key functionalities is enabling video streaming on various platforms. However, a crucial aspect of its effectiveness is the support it provides for video playback bandwidth. Video streaming requires substantial bandwidth to ensure smooth playback, particularly for high-definition content. In this article, we will explore how Croxy Proxy handles bandwidth for video playback, its potential limitations, and how it impacts user experience. Understanding the Bandwidth Requirements for Video PlaybackBefore diving into how Croxy Proxy supports video playback bandwidth, it’s essential to understand the bandwidth requirements for smooth video streaming. Video content, especially in high definition (HD) or ultra-high definition (UHD), demands significant amounts of data to be transmitted continuously from the server to the user’s device. The higher the video quality, the greater the bandwidth needed.For instance, standard-definition video (SD) usually requires a minimum bandwidth of 3 Mbps, while high-definition (HD) videos can require anywhere from 5 Mbps to 8 Mbps. Ultra-high-definition (UHD or 4K) videos, on the other hand, may demand bandwidth speeds of 25 Mbps or more. Croxy Proxy needs to ensure that the bandwidth it provides can handle such demands effectively, particularly in the context of users who may not have direct access to fast internet connections.How Croxy Proxy Handles Video Streaming BandwidthCroxy Proxy acts as an intermediary between the user and the content they wish to access, including video streaming platforms. It works by routing the user’s web traffic through its servers, which can sometimes affect the bandwidth available for video playback. Here are the factors that influence Croxy Proxy’s support for video streaming bandwidth:1. Server Location and Load: Croxy Proxy’s server location plays a crucial role in determining the available bandwidth. If the proxy server is located closer to the content source, the data transfer is typically faster, reducing buffering and loading times. On the other hand, if the server is located far from the content provider or is experiencing high traffic, the bandwidth may be reduced, leading to slower video playback or interruptions.2. Video Quality Selection: Most video streaming services allow users to select the quality of the video they wish to stream. Croxy Proxy may limit the maximum video quality that can be streamed based on the available bandwidth through its servers. For example, if a user is on a slower internet connection, Croxy Proxy may restrict video playback to lower resolutions (e.g., 480p or 720p) to prevent buffering.3. Compression and Caching: Croxy Proxy may employ video compression techniques or caching strategies to improve bandwidth efficiency. By compressing the video stream before it reaches the user, Croxy Proxy can reduce the amount of data required, making it easier for users with slower internet connections to stream videos smoothly. Caching commonly accessed videos on the proxy server can also reduce the bandwidth load by delivering the video faster to users without fetching it from the original content server each time.4. Protocol Support and Optimization: Croxy Proxy’s support for different streaming protocols (such as HTTP, RTMP, or HLS) can significantly impact the quality and consistency of video playback. Optimized protocols ensure a more stable connection between the user and the server, which directly impacts the video streaming experience. If Croxy Proxy does not optimize the protocols effectively, users may face slow buffering times or interruptions during video playback.Challenges and Limitations in Bandwidth SupportWhile Croxy Proxy can be a useful tool for streaming video content, there are inherent challenges and limitations related to bandwidth support. These challenges include:1. Network Congestion: One of the primary challenges that users face when using Croxy Proxy for video streaming is network congestion. If too many users are accessing the proxy service at once, the bandwidth becomes divided among all users, which can significantly affect video streaming quality. This is especially problematic for high-definition or 4K video streaming, where higher bandwidth is crucial for smooth playback.2. Geographical Limitations: The geographical location of the user and the proxy server can also create limitations. For example, if a user is located far away from Croxy Proxy’s servers, the data transfer speed may be significantly reduced, resulting in slower video playback. Additionally, internet service providers (ISPs) may impose throttling on certain types of traffic, further limiting the available bandwidth for video streaming.3. Video Encryption and DRM Protection: Some video streaming platforms use encryption and digital rights management (DRM) to protect their content. Croxy Proxy may struggle with decrypting or bypassing these protections, limiting its ability to deliver smooth video playback. In such cases, users may experience interruptions or degraded video quality.Improving Video Playback with Croxy ProxyTo address these challenges and improve video playback experiences, users can consider several strategies:1. Use of Dedicated Servers: Opting for a premium version of Croxy Proxy or using a dedicated server can improve video streaming bandwidth. Dedicated servers often provide more stable and faster internet connections, reducing the likelihood of buffering or lag during playback.2. Selecting Lower Video Quality: If experiencing buffering or interruptions, users can manually select a lower video quality to reduce bandwidth demand. While this may reduce the video’s visual quality, it can ensure smoother playback, especially on slower internet connections.3. Optimizing Internet Connection: Users can also optimize their internet connections by using wired connections instead of Wi-Fi, minimizing background data usage, or choosing internet plans with higher speeds. This can help maximize the available bandwidth for video streaming, even when using Croxy Proxy.4. Using Proxy Services with Better Optimization: Some proxy services are more optimized for streaming high-quality video content. By selecting a proxy service that is specifically designed for video streaming, users may experience better bandwidth support and improved video playback performance.Croxy Proxy offers a useful solution for bypassing geographical restrictions and streaming video content from various platforms. However, the effectiveness of Croxy Proxy in supporting video playback bandwidth depends on various factors, such as server location, user internet connection, and the proxy's optimization techniques. While Croxy Proxy can offer good support for lower video quality or when used with dedicated servers, it faces limitations when handling high-definition or 4K video streams, especially during times of high user traffic or network congestion. Users can enhance their video streaming experience by considering the strategies mentioned above, ensuring that they get the best possible performance from Croxy Proxy for video playback.

Jun 05, 2025

Read story
blog

How to embed Oxylabs proxy in Selenium automated tests?

In the realm of automation testing, Selenium has become one of the most widely used tools due to its ability to interact with web elements and simulate user actions. However, in certain scenarios, integrating proxies is essential for bypassing geographic restrictions, managing IP blocks, or conducting tests from various locations. Oxylabs, a leading provider of proxy solutions, offers a range of tools that can be seamlessly integrated into Selenium to enhance the testing experience. This article will provide a detailed guide on how to embed Oxylabs proxy into Selenium automation tests, explaining the setup process, configuration, and best practices. Understanding the Need for Proxies in Selenium Automation TestingSelenium is a powerful automation tool used for testing web applications, but there are scenarios where testers need to access different regions, test with multiple IP addresses, or simulate real-world user experiences from various geographical locations. In such cases, proxies play a crucial role by masking the original IP address and providing access to content that might otherwise be restricted due to region-based blocking or other restrictions.Using proxies in Selenium tests allows testers to:1. Test region-specific content: Some websites serve different content based on the user's IP address or geographic location. Proxies enable testers to simulate these different locations and test the content rendering. 2. Avoid IP bans: Websites can block or limit access to a single IP address after too many requests. Using proxies helps distribute the requests across multiple IPs, preventing bans.3. Enhance anonymity: Proxies help maintain anonymity, which is vital for testing scenarios that require privacy, such as checking if a website tracks users' IP addresses.Oxylabs offers a robust proxy network that can be seamlessly integrated into Selenium for automated testing. Let's now explore the steps to integrate Oxylabs proxy with Selenium.Steps to Integrate Oxylabs Proxy with SeleniumIntegrating Oxylabs proxy into Selenium involves a few straightforward steps. Here's a detailed breakdown:Step 1: Set Up Oxylabs ProxyBefore embedding the Oxylabs proxy into Selenium, ensure you have an active Oxylabs account and access to their proxy services. Once you’ve signed up and logged into your Oxylabs account, you’ll need to:1. Get Proxy Details: You will be provided with a proxy username, password, and IP addresses of the proxy servers. These credentials are crucial for authentication.2. Choose the Proxy Type: Oxylabs provides different types of proxies, such as residential and data center proxies. Depending on your testing needs, you should choose the right proxy type. residential proxies are more suitable for simulating real user traffic, while data center proxies are faster and more cost-effective.Step 2: Configure Selenium WebDriver to Use Oxylabs ProxyNow that you have the Oxylabs proxy details, it’s time to configure the Selenium WebDriver to route traffic through the Oxylabs proxy.Here’s how to configure it using Python (the process is similar for other languages such as Java, C, etc.):```pythonfrom selenium import webdriverfrom selenium.webdriver.common.proxy import Proxy, ProxyType Define proxy detailsproxy = "your_proxy_ip:port"username = "your_username"password = "your_password" Set up proxy configuration for WebDriverproxy_settings = Proxy()proxy_settings.proxy_type = ProxyType.MANUALproxy_settings.http_proxy = proxyproxy_settings.ssl_proxy = proxy Enable authentication using username and passwordcapabilities = webdriver.DesiredCapabilities.CHROMEcapabilities['proxy'] = { 'proxyType': 'MANUAL', 'httpProxy': proxy, 'sslProxy': proxy, 'noProxy': '', 'class': "org.openqa.selenium.Proxy", 'autodetect': False} Launch Chrome with the proxy configurationdriver = webdriver.Chrome(desired_capabilities=capabilities) Access a website to verify proxy setupdriver.get("https:// PYPROXY.com")```In the code above, we configure the WebDriver to use the Oxylabs proxy by defining the proxy server details, setting up the `Proxy` object, and using the desired capabilities to configure the browser.Step 3: Handle Proxy Authentication (Optional)Some proxies, including Oxylabs, require authentication. In this case, you can add an authentication handler to Selenium WebDriver using your proxy credentials. This step ensures that the WebDriver can successfully connect to the proxy server without issues.A common approach to handle proxy authentication in Selenium is using an extension or modifying the WebDriver to handle HTTP basic authentication dialogs. This can be done by setting up a proxy extension in the browser or using tools like `ProxyAutoAuth` for automated handling.Step 4: Test and Verify Proxy IntegrationAfter setting up the proxy, it’s important to verify that your WebDriver is correctly routing traffic through Oxylabs. To do this, you can use a simple script that checks the IP address of the site you're visiting. By comparing the displayed IP address with your real one, you can confirm that the proxy is being used.```pythondriver.get("https://www.whatismyip.com") Verify if the IP address displayed is the proxy ip```If the IP displayed is the one provided by Oxylabs, you’ve successfully integrated the proxy into Selenium.Best Practices for Using Proxies in Selenium TestingWhile integrating proxies into your Selenium tests offers many benefits, there are a few best practices that can help you get the most out of this setup:1. Rotate Proxies Regularly: For large-scale tests, it’s essential to rotate proxies regularly to avoid IP bans. Oxylabs offers a proxy rotation feature that can be automated to switch IPs at predefined intervals.2. Monitor Proxy Performance: Proxies can sometimes experience downtime or slow performance. It’s essential to monitor your proxies and ensure they are functioning correctly during test runs.3. Respect Website Terms and Conditions: While proxies allow you to bypass restrictions, ensure that you are not violating the terms and conditions of the websites you are testing against. Always respect website policies and use proxies ethically.4. Use Proxy Pools: Consider using a pool of proxies from Oxylabs for large-scale testing. This ensures that your tests can scale, providing a better simulation of real-world user traffic from different locations.ConclusionIntegrating Oxylabs proxy into Selenium automation testing is a powerful way to enhance your testing process, especially when dealing with geographical restrictions, IP bans, or anonymity concerns. By following the steps outlined in this article, you can easily configure and manage Oxylabs proxies in your Selenium tests. With the right configuration and best practices, you can leverage proxies to perform comprehensive, real-world testing that ensures your web application performs well across different regions and environments.

Jun 09, 2025

Read story
blog

Configuration template for deploying SOCKS proxy services in Docker containers

In today’s rapidly evolving IT infrastructure, managing network traffic securely and efficiently is paramount. A SOCKS proxy service, which can route traffic through a secure server, is often used to achieve this. Docker, with its lightweight containerization technology, offers an effective way to deploy SOCKS proxy services. This article provides a detailed template for setting up a SOCKS proxy inside a Docker container, with a clear and structured approach. This solution is particularly useful for businesses or developers looking for secure internet access, bypassing geographic restrictions, or maintaining privacy in network communications. Let’s dive into how you can configure and deploy a SOCKS proxy service within a Docker container to maximize your operational efficiency and security. Understanding SOCKS ProxySOCKS (Socket Secure) is an internet protocol that facilitates the routing of network packets between a client and server through a proxy server. Unlike HTTP proxies that only handle HTTP requests, SOCKS proxies work at a lower level, which means they can handle various types of traffic such as FTP, SMTP, and even peer-to-peer (P2P) protocols.A SOCKS proxy acts as an intermediary between a user’s computer and the internet, masking the user’s IP address. This helps secure sensitive information and provides users with the ability to access the internet without directly exposing their identity or location. The use of SOCKS proxies has become common in secure browsing, bypassing internet restrictions, and anonymizing internet traffic.Why Use Docker to Deploy SOCKS ProxyDocker offers a clean, isolated environment for applications, which is why it’s ideal for deploying a SOCKS proxy service. Here are a few reasons why Docker is an excellent choice for hosting a SOCKS proxy:1. Portability: Docker containers can run on any system that supports Docker, whether it’s on a local machine or a cloud server. This makes deployment and scaling easier.2. Isolation: Docker ensures that the SOCKS proxy service runs in an isolated environment, which minimizes potential security risks.3. Easy Maintenance: Docker containers are easy to update, roll back, and maintain. The configuration files and environment can be version-controlled for quick deployment across different systems.4. Resource Efficiency: Docker containers use fewer resources compared to traditional virtual machines, making it a lightweight option for proxy services.Steps to Deploy SOCKS Proxy in DockerDeploying a SOCKS proxy service within a Docker container involves several key steps. This section outlines a basic template to configure and deploy the proxy.Step 1: Preparing Docker EnvironmentBefore deploying the SOCKS proxy service, ensure that Docker is installed on your machine. Docker can be installed on various operating systems like Windows, macOS, and Linux. Once installed, verify the Docker installation by running the following command:```docker --version```This will confirm that Docker is running correctly.Step 2: Choose a SOCKS Proxy ImageThe next step is to select a suitable SOCKS proxy image for Docker. One popular choice is the dante-server or shadowsocks image, both of which support SOCKS proxy functionality.You can find the available Docker images on Docker Hub or other registries. For PYPROXY, you can pull the dante-server image by running the following command:```docker pull instrumentisto/dante```This image will serve as the base for your SOCKS proxy container.Step 3: Create a Docker ContainerOnce the image is pulled, the next step is to configure and run the container. You will need to create a Docker container using the pulled image. Below is a basic pyproxy of how to run the SOCKS proxy container:```docker run -d --name socks-proxy -p 1080:1080 instrumentisto/dante```This command runs the container in detached mode (`-d`), binds the container’s SOCKS proxy service to port 1080 (`-p 1080:1080`), and names the container "socks-proxy".Step 4: Configuring the SOCKS ProxyThe configuration file for the SOCKS proxy server can usually be found in the container’s configuration directory. For the dante-server, the configuration file is typically located in `/etc/danted.conf`. You can customize this file to set various parameters such as allowed IP addresses, authentication methods, and more.pyproxy configuration might include:```logoutput: /var/log/danted.loginternal: eth0 port = 1080external: eth0method: username noneuser.notprivileged: nobodyclientmethod: none```- internal: Specifies the internal network interface and the port the SOCKS proxy will listen on.- external: Defines the external interface to use for outgoing connections.- method: Defines the authentication method. You can choose from several options like `none` or `username`.- user.notprivileged: Specifies the user that the service will run as for security.Once you modify the configuration, restart the container to apply the changes.```docker restart socks-proxy```Step 5: Test the SOCKS ProxyAfter setting up and configuring the SOCKS proxy in Docker, it’s essential to test if the proxy is working as expected. You can use various tools to test the connection, such as the `curl` command or a browser configured to use the SOCKS proxy.To test with `curl`, run the following command:```curl --socks5 127.0.0.1:1080 http://pyproxy.com```If the proxy is functioning correctly, you should see the response from the target website.Security ConsiderationsWhile Docker provides a level of isolation for the SOCKS proxy, it’s important to take additional security measures:1. Limit Access: Ensure that the SOCKS proxy is not accessible to the public unless necessary. Use firewall rules to restrict access to the proxy service.2. Authentication: Implement user authentication to restrict access to authorized users only.3. Monitor Logs: Regularly monitor the logs to detect any unusual activity or potential security breaches.Deploying a SOCKS proxy service in a Docker container is a powerful solution for securing network traffic and improving privacy. By following the steps outlined in this article, you can easily set up a SOCKS proxy using Docker. This deployment method provides the advantages of portability, isolation, and efficiency, making it an ideal choice for developers and businesses alike. However, ensure that you configure the proxy securely and monitor its performance regularly to maintain an optimal and secure environment.

May 29, 2025

blog

How to achieve deep browser fingerprint masquerading with GeoNode proxy?

In the current era of advanced tracking technologies, browser fingerprinting has become one of the most effective methods for online tracking and user identification. However, in some cases, users may want to mask or obfuscate their online identities to protect privacy. This is where GeoNode proxy comes into play. GeoNode proxy offers a unique solution for deep browser fingerprint obfuscation by masking certain attributes, making it harder for websites to track and identify users. This article provides a comprehensive guide on how GeoNode proxy can help in achieving this goal, along with practical examples and a deeper understanding of how the technology works. What is GeoNode Proxy?GeoNode Proxy is a powerful tool designed to manipulate network traffic between the user’s browser and the server they are interacting with. It allows for modification of network requests, essentially making it appear as though the user is accessing the web from a different location or using different browser characteristics. This proxy can be configured to rotate various IP addresses, headers, and user proxy strings to mask the user's true identity, making it much more difficult for websites to create accurate fingerprints.How Browser Fingerprinting WorksBrowser fingerprinting is the process of collecting specific attributes from a user’s browser and device that can uniquely identify them. These attributes include:1. User-proxy String – Information about the browser and operating system.2. Screen Resolution – The resolution of the user's screen.3. Installed Fonts – A list of fonts installed on the user’s device.4. WebGL Fingerprint – Details about the user’s graphics card and GPU.5. Timezone – The timezone the user is operating in.6. Canvas Fingerprint – Information gathered from HTML5 canvas elements.7. Browser Plugins – A list of plugins installed in the browser.When these attributes are combined, they create a unique identifier for the user, similar to a digital fingerprint. By analyzing these characteristics, websites can track users across different sessions, even without cookies.The Importance of Browser Fingerprint ObfuscationFor privacy-conscious users or organizations aiming to preserve anonymity online, obfuscating or masking browser fingerprints is essential. By altering or hiding certain browser characteristics, users can evade tracking techniques used by websites to follow them across the internet. GeoNode proxy plays a pivotal role in this process.How GeoNode Proxy Helps in Browser Fingerprint ObfuscationGeoNode proxy achieves deep browser fingerprint obfuscation in several key ways. Below are the most effective strategies employed:1. IP Rotation One of the most basic yet effective methods for obfuscation is IP rotation. GeoNode proxies can automatically rotate IP addresses for each request or session. This creates the illusion that the user is accessing the web from different locations, making it harder for websites to track users based on their IP addresses. By frequently changing IPs, the proxy adds a layer of anonymity and prevents persistent tracking methods from being effective.2. User-proxy Spoofing The User-proxy string is one of the most commonly used attributes in browser fingerprinting. GeoNode proxy can alter the User-proxy string to simulate different browsers or devices. By randomly changing the User-proxy string, the proxy ensures that a website cannot reliably track the user's browser characteristics.3. Header Modifications GeoNode proxy also allows for the manipulation of HTTP headers. Headers like `Accept-Language`, `Referer`, and `X-Forwarded-For` can be modified to prevent websites from gathering information about the user's browsing habits or location. By changing these headers, the proxy adds an extra layer of confusion, making it harder for websites to identify the user based on these patterns.4. Timezone & Locale Randomization The timezone and locale settings of a user’s browser are often used to track their geographical location. GeoNode proxy can randomize these settings, creating false signals that mislead websites into thinking the user is from a different timezone or region.5. Canvas & WebGL Fingerprint Masking WebGL and Canvas fingerprinting are advanced methods used to uniquely identify a user’s device based on its graphics rendering capabilities. GeoNode proxies can modify or mask these fingerprints, making it impossible for websites to collect accurate data on the user’s device graphics.6. Browser Plugins & Fonts Obfuscation The list of browser plugins and installed fonts is unique to each user and can be used to build a detailed profile. GeoNode proxy can modify the list of plugins and fonts presented to websites, making it appear as though the user has a different configuration than they actually do. This significantly reduces the likelihood of identification based on these attributes.Practical Applications of GeoNode Proxy in Fingerprint Obfuscation1. Avoiding Ad Tracking Advertisers use browser fingerprinting to track users and display personalized ads. By using GeoNode proxy, users can effectively prevent such tracking and maintain their privacy. The proxy’s ability to rotate IPs, spoof User-proxy strings, and randomize other fingerprint attributes makes it a powerful tool for users seeking to avoid ad profiling.2. Bypassing Geo-restrictions Many websites and services use geographic data obtained through browser fingerprinting to impose location-based restrictions. GeoNode proxy allows users to bypass these restrictions by altering the geographic data associated with their requests. This is especially useful for users trying to access content that is otherwise blocked in their region.3. Preventing Identity Theft Cybercriminals often use fingerprinting techniques to track and steal user data. By using GeoNode proxy, users can protect themselves from such threats by preventing websites from building accurate user profiles.4. Enhanced Online Privacy for Businesses Companies operating in sensitive sectors can use GeoNode proxy to enhance their online privacy. Employees accessing sensitive information can use the proxy to ensure that their actions are not tracked or monitored by external parties.Challenges and Limitations of Browser Fingerprint ObfuscationWhile GeoNode proxy is an effective tool for browser fingerprint obfuscation, there are a few challenges and limitations to consider:1. Complexity Setting up and configuring GeoNode proxy may require technical knowledge. Businesses and individual users must understand the configuration of the proxy to maximize its effectiveness.2. Detection Mechanisms Some advanced websites and services have mechanisms in place to detect proxy usage. GeoNode proxy can obfuscate most fingerprinting data, but there is still a risk that some websites may detect unusual traffic patterns and block access.3. Performance Overhead The use of a proxy can add latency to network requests. This may result in a slight decrease in browsing speed, which could be noticeable for users with slower internet connections.GeoNode proxy offers a robust solution for deep browser fingerprint obfuscation. By rotating IPs, spoofing User-proxy strings, and manipulating various other browser attributes, GeoNode makes it difficult for websites to track and identify users. This is particularly valuable for users who are concerned about their privacy and wish to avoid being tracked for advertising purposes or other malicious activities. However, users must consider the potential challenges and limitations, such as the complexity of setup and the possibility of detection. Overall, GeoNode proxy is a valuable tool for anyone looking to protect their online identity and maintain anonymity.

May 29, 2025

blog

IPRoyal's Technical Adaptation and Customer Support Strategy in the Wave of IPv6 Migration

As the world shifts towards IPv6, businesses and service providers are under pressure to adapt their systems to the new protocol. IPRoyal, a leading provider in this domain, has developed a comprehensive technical adaptation and customer support strategy to help users navigate the complexities of the IPv6 migration. This article will delve into IPRoyal's strategic response to this wave, exploring how their technical infrastructure is evolving, the steps taken to ensure smooth customer transitions, and the value these efforts bring to their clients. The transition to IPv6 is not merely a technical update but a vital necessity for ensuring scalability, security, and performance in an increasingly connected world. The Need for IPv6 Migration and Its ChallengesThe global adoption of IPv6 has become essential as the pool of available IPv4 addresses continues to dwindle. This situation has led to the increasing need for organizations to upgrade their networks to support IPv6. The shift to IPv6 promises several advantages, including a significantly larger address space, improved security features, and better network efficiency. However, this transition is not without its challenges. Organizations face numerous technical hurdles, such as ensuring compatibility with legacy systems, upgrading hardware and software, and training staff to handle the new protocol.For companies like IPRoyal, this transition requires careful planning and investment to ensure their services remain reliable and secure for clients during and after the migration process. The challenge, however, presents an opportunity to improve their offerings and enhance the user experience.IPRoyal's Technical Adaptation to IPv6IPRoyal has undertaken a multi-phase technical adaptation plan to align with the IPv6 standard, ensuring that all their systems and services are fully compatible with the new protocol. This process begins with infrastructure upgrades, such as enhancing their data centers and network equipment to support IPv6 traffic. By integrating IPv6 into their core systems, IPRoyal is future-proofing their network, enabling them to scale and meet the growing demands of users.One of the primary goals of IPRoyal's technical adaptation strategy is to ensure seamless connectivity. This involves implementing dual-stack configurations, which allow systems to handle both IPv4 and IPv6 traffic simultaneously. By adopting this hybrid approach, IPRoyal can provide uninterrupted service to clients who may not have fully migrated to IPv6 yet, while gradually transitioning them to the new standard.Moreover, IPRoyal's technical team is focused on optimizing routing protocols and security measures to take advantage of IPv6's enhanced capabilities. The protocol's built-in security features, such as IPsec, allow IPRoyal to offer more secure connections to their clients, an important consideration as cyber threats continue to evolve.Customer Support Strategies During the IPv6 TransitionAdapting to IPv6 can be a daunting task for many clients, especially those with limited technical expertise. IPRoyal recognizes this challenge and has devised a robust customer support strategy to assist users through the migration process. Their support approach centers on providing clear communication, educational resources, and hands-on assistance to ensure a smooth transition.One of the key aspects of IPRoyal’s customer support strategy is their dedicated support teams, trained to handle IPv6-related queries and issues. These teams offer technical guidance to help clients understand how the migration will affect their existing systems and how to make the necessary adjustments. Whether it’s updating software, configuring network devices, or troubleshooting connectivity issues, IPRoyal’s support staff is equipped to assist clients every step of the way.In addition to direct support, IPRoyal offers a variety of educational resources, including webinars, tutorials, and documentation, to help clients understand the benefits and challenges of IPv6. By providing these resources, IPRoyal empowers their clients to take control of the migration process, making the transition less overwhelming.Ensuring Smooth IPv6 Integration for ClientsIPRoyal has implemented several strategies to ensure their clients can integrate IPv6 without disrupting their existing operations. One of these strategies is the phased approach to migration. Instead of forcing clients to make a complete switch to IPv6 at once, IPRoyal allows clients to migrate in stages, reducing the risk of downtime and ensuring that any issues are addressed before full adoption.Additionally, IPRoyal works closely with clients to assess their specific needs and offer customized solutions. Whether a client requires a fully IPv6-enabled network or simply needs to connect a few devices, IPRoyal tailors its offerings to meet the client’s unique requirements. This level of personalization ensures that each client’s migration journey is as smooth and efficient as possible.Another critical aspect of ensuring smooth integration is IPRoyal's commitment to maintaining backward compatibility with IPv4. While transitioning to IPv6 is necessary, many businesses still rely on IPv4 for certain applications. By offering dual-stack solutions, IPRoyal ensures that clients can continue to use IPv4 alongside IPv6, providing them with the flexibility they need during the transition period.The Value IPRoyal Brings to Clients During IPv6 MigrationIPRoyal's approach to IPv6 migration brings significant value to their clients, both in terms of technical advantages and customer support. By adapting their infrastructure and services to IPv6, IPRoyal not only ensures future-proofing but also improves security and performance, critical factors in today’s digital landscape. Clients can rely on IPRoyal to deliver high-performance services, even as the global network architecture evolves.Furthermore, the dedicated customer support team and educational resources provide clients with the confidence and knowledge to navigate the IPv6 migration process. This ensures that businesses of all sizes can embrace the transition without fearing major disruptions to their services. IPRoyal’s personalized approach, combined with their focus on dual-stack compatibility, makes the migration experience seamless and stress-free for clients.The shift to IPv6 is inevitable and necessary for the continued growth and security of the internet. IPRoyal’s proactive technical adaptation and comprehensive customer support strategies ensure that clients can transition smoothly into the new era of networking. By addressing the challenges of IPv6 migration head-on and offering tailored solutions, IPRoyal demonstrates their commitment to supporting clients through this critical transition. The company’s efforts not only ensure operational continuity but also empower clients with the tools and knowledge needed to leverage the benefits of IPv6, ensuring long-term success in an increasingly connected world.

May 29, 2025

blog

How to automate IP resource scheduling via GitHub Proxy's API?

In today’s digital world, managing and automating IP resource scheduling has become essential for organizations that handle large-scale network operations. The concept of automating the scheduling of IP resources through an API, like the GitHub Proxy API, is not just a way to simplify processes but also ensures resource allocation efficiency, minimizes network congestion, and enhances the user experience. GitHub Proxy API, in particular, is one of the tools that allow seamless management of resources. By leveraging this API, businesses can set up a mechanism that automatically assigns, updates, and monitors IP addresses, thereby streamlining workflow. This article delves into the step-by-step approach on how to utilize this API for IP resource scheduling and its benefits for clients in enhancing overall operational efficiency. 1. Understanding GitHub Proxy APIBefore diving into the process of IP resource scheduling, it is crucial to understand what GitHub Proxy API is and how it can be used in automating tasks. GitHub Proxy API acts as an intermediary between clients and external resources. It allows the management of multiple IP addresses by automating certain tasks such as assigning new IP addresses, releasing old ones, or even monitoring their usage. It functions by proxying requests from users to a target server or service, while also managing the corresponding IP resources on behalf of the user.For the context of IP scheduling, the API enables developers to automate the allocation of IP addresses based on specific conditions, such as user demand, traffic loads, and operational requirements. This is particularly useful in scenarios where networks experience a high volume of concurrent users or need to balance resources efficiently.2. Why Automate IP Resource Scheduling?Automation in IP resource scheduling provides a wealth of benefits to organizations and individuals. The following are the key reasons why automation should be considered:- Efficiency and Time-Saving: Manual scheduling of IP resources can be time-consuming and error-prone. With automation, processes that previously took hours can now be completed in seconds, allowing employees to focus on more important tasks. - Optimal Resource Utilization: By automating IP allocation, organizations can ensure that IP addresses are assigned dynamically based on usage needs. This minimizes waste, reduces the chance of IP conflicts, and ensures that available resources are always fully utilized.- Scalability: As businesses grow, their need for additional IP addresses may increase. Automated systems can scale to accommodate this growing demand, ensuring that the infrastructure remains robust without requiring constant manual intervention.- Reduced Human Error: Human mistakes in manual IP scheduling can lead to issues such as network downtime or resource misallocation. Automation minimizes such risks, leading to a smoother network experience.3. How GitHub Proxy API Works for IP Resource SchedulingNow that we understand the benefits of automation, let’s look into how the GitHub Proxy API works specifically for automating IP scheduling.- Step 1: Setting Up GitHub Proxy API The first step is to integrate the GitHub Proxy API with the system that requires automated IP management. This typically involves setting up API keys and configuring the proxy server to handle requests. API access must be properly authenticated, ensuring that only authorized users can schedule or assign IP resources.- Step 2: IP Address Pool Management With the API integrated, the next step is managing a pool of available IP addresses. This can be done by configuring the system to recognize which IPs are free, which ones are in use, and which need to be decommissioned. The GitHub Proxy API allows for setting rules that will dictate how IPs are allocated based on certain metrics such as availability, usage frequency, or load requirements.- Step 3: Automating the Allocation Process The core functionality of the GitHub Proxy API lies in its ability to automate IP allocation. By utilizing pre-configured rules, the system can automatically assign IP addresses to new users or services based on real-time data. For example, when a new server is deployed or an application requires an IP for communication, the API will seamlessly assign a suitable address without manual intervention.- Step 4: Monitoring and Releasing IPs Another critical feature of the GitHub Proxy API is monitoring the usage of IP addresses. Once an IP address is no longer required, the system can automatically release it back into the pool for future use. Continuous monitoring ensures that the allocated IP resources are always being used optimally.4. Real-World Application: Practical Scenarios of Using GitHub Proxy API for IP SchedulingTo better understand the power of automated IP scheduling, let’s explore some real-world scenarios in which the GitHub Proxy API can be beneficial.- Cloud Services: In cloud computing, service providers need to assign dynamic IPs to users as they scale their services. By using the GitHub Proxy API, the service provider can automate the process of assigning IPs based on user demand, without requiring manual intervention. - Content Delivery Networks (CDN): For businesses that rely on CDNs to deliver content efficiently across different regions, IP management is crucial for ensuring smooth delivery. The GitHub Proxy API can automate the distribution of IPs across different regions, enabling better traffic management and optimized network performance.- Load Balancing: In systems where traffic load varies, the API can dynamically adjust the allocation of IP addresses based on load factors. This ensures that no single server or network resource becomes overwhelmed, providing a better user experience.5. Benefits of Using GitHub Proxy API for ClientsThe implementation of the GitHub Proxy API for automated IP resource scheduling offers several key advantages for clients:- Cost-Effective: By reducing the need for manual IP management, businesses can save on administrative costs. Automation reduces the need for a large technical team dedicated solely to IP management tasks.- Improved Performance: As the system automatically assigns and releases IP resources based on demand, network performance is enhanced. This leads to reduced latency, better load distribution, and improved overall user experience.- Seamless Scalability: As businesses grow, their network requirements will change. Automated IP scheduling allows for seamless scalability, ensuring that the network infrastructure can grow with the company without interruption.In conclusion, automating IP resource scheduling through tools like the GitHub Proxy API is a game-changer for organizations seeking to optimize their network performance and resource allocation. By automating processes that were traditionally manual and error-prone, businesses can ensure a more efficient, scalable, and cost-effective network environment. The benefits for clients are clear: improved performance, reduced costs, and the ability to scale seamlessly as demand grows. Leveraging the GitHub Proxy API not only streamlines operations but also contributes significantly to an enhanced user experience, making it an invaluable tool for any network-intensive organization.

May 29, 2025

blog

How does http-proxy-middleware defend against request header tampering attacks?

In modern web applications, security is a top priority, and one critical area that needs attention is the potential for request header tampering. This type of attack can occur when an attacker modifies the headers of an HTTP request before it reaches the backend server. The use of proxy servers is one common strategy for securing web applications, and HTTP-Proxy-Middleware plays a vital role in defending against such threats. By providing a layer of abstraction between the client and the server, HTTP-Proxy-Middleware ensures that malicious modifications to request headers are intercepted and mitigated. This article delves into the mechanisms of HTTP-Proxy-Middleware and explains how it helps prevent request header tampering attacks effectively. Understanding the Threat: Request Header TamperingBefore discussing how HTTP-Proxy-Middleware defends against request header tampering, it’s important to first understand what this attack entails. Request header tampering refers to the act of manipulating HTTP headers—such as `User-Proxy`, `Authorization`, or `X-Forwarded-For`—to exploit vulnerabilities in the backend application. Attackers may attempt to spoof user identities, bypass security filters, or inject malicious content, which can ultimately compromise sensitive data, session integrity, and system security.The consequences of such attacks can range from unauthorized access to critical resources to the execution of malicious code that leads to data breaches or denial-of-service (DoS) attacks. To mitigate this risk, securing the integrity of HTTP headers is crucial, and this is where HTTP-Proxy-Middleware comes into play.The Role of HTTP-Proxy-Middleware in Preventing Header TamperingHTTP-Proxy-Middleware serves as a proxy between the client and the backend server, allowing developers to filter and manipulate incoming requests before they reach the server. This functionality is essential in protecting against various security threats, including request header tampering. Here’s how HTTP-Proxy-Middleware can help defend against these attacks:1. Request Validation: One of the key ways HTTP-Proxy-Middleware helps prevent header tampering is by enforcing strict validation of incoming request headers. By setting rules that specify which headers are allowed or expected, the middleware can reject any requests that include unauthorized or unexpected headers. For instance, it can filter out any modifications to headers like `X-Forwarded-For` that are commonly targeted for spoofing. This ensures that only valid headers are processed by the backend server, minimizing the risk of attack.2. Header Whitelisting: HTTP-Proxy-Middleware can be configured to whitelist specific headers that are necessary for the application’s functionality. This means that only headers explicitly listed in the configuration will be passed on to the backend server. Any request with additional or altered headers can be blocked. This approach not only enhances security but also streamlines the request-handling process by removing unnecessary complexity and overhead.3. Preventing HTTP Response Splitting: HTTP response splitting is a tactic that attackers can use to inject malicious content into responses by manipulating HTTP headers. HTTP-Proxy-Middleware can intercept and sanitize the request headers, particularly the ones that might be vulnerable to this type of attack. By ensuring that headers like `Location` or `Set-Cookie` are properly handled and validated, the middleware can block attempts to exploit response-splitting vulnerabilities.Advanced Mechanisms for Defending Against Header TamperingIn addition to basic validation and whitelisting, HTTP-Proxy-Middleware provides advanced mechanisms for more robust defense against header tampering attacks. Let’s explore some of these techniques in detail:1. Custom Header Inspection: One of the most powerful features of HTTP-Proxy-Middleware is the ability to inspect and modify headers programmatically. Developers can write custom logic to validate or reject specific headers based on certain conditions, such as the presence of malicious patterns or suspicious characters. For instance, it can detect common attack vectors like SQL injection, cross-site scripting (XSS), or command injection in headers and prevent those requests from reaching the server.2. Logging and Monitoring: Another important defense strategy that HTTP-Proxy-Middleware enables is logging and monitoring of incoming requests. By logging header details, administrators can spot unusual patterns or repeated attempts to manipulate headers. These logs can serve as an early warning system for potential attacks, allowing for timely intervention. Furthermore, regular monitoring ensures that any new attack strategies are quickly identified and mitigated.3. Rate Limiting and IP Filtering: Attackers often rely on large volumes of requests to overwhelm the server or break through security defenses. HTTP-Proxy-Middleware can implement rate limiting, which restricts the number of requests from a single IP address or client within a specific time frame. This helps to mitigate brute-force attacks where an attacker repeatedly sends modified headers to gain unauthorized access.4. Cross-Origin Resource Sharing (CORS) Policy Enforcement: Many types of attacks that involve header tampering are cross-origin in nature. HTTP-Proxy-Middleware can enforce strict CORS policies, ensuring that only trusted origins can send requests to the backend server. By restricting the sources that are allowed to make requests, the middleware reduces the attack surface for header manipulation.Best Practices for Configuring HTTP-Proxy-MiddlewareTo maximize the security benefits of HTTP-Proxy-Middleware in defending against header tampering, developers should follow a set of best practices when configuring the middleware. These include:1. Define Clear Header Policies: Developers should define clear header policies that specify which headers are allowed, which are optional, and which should be rejected outright. This minimizes the chances of unauthorized modifications slipping through.2. Use HTTPS for Encryption: Ensure that all communication between clients, proxies, and servers is encrypted using HTTPS. This prevents attackers from tampering with request headers during transmission, particularly in man-in-the-middle (MITM) attacks.3. Regularly Update Dependencies: As with any software component, it’s important to keep HTTP-Proxy-Middleware and its dependencies up to date to avoid known vulnerabilities. Regular updates ensure that any patches or improvements related to security are applied promptly.4. Testing and Auditing: Regular testing and security audits are essential to ensure that the middleware’s defenses are functioning as expected. This includes conducting penetration testing to identify weaknesses and vulnerabilities that could be exploited by attackers.Request header tampering is a serious threat to the security of web applications, but by using tools like HTTP-Proxy-Middleware, developers can significantly reduce the risks associated with this type of attack. Through techniques like request validation, header whitelisting, custom header inspection, and advanced monitoring, HTTP-Proxy-Middleware serves as an essential tool in safeguarding web applications. By following best practices and staying vigilant against emerging threats, organizations can ensure that their applications remain secure and resilient against the growing range of cyberattacks targeting request headers.

May 29, 2025

blog

How to configure Google proxy server for cross border access via Google usa socks5 proxy?

In the modern digital age, internet censorship and geo-restrictions are common hurdles for users trying to access content from other countries. One of the effective solutions to bypass these restrictions is by using a proxy server. By configuring a Google USA socks5 proxy, users can securely access websites and services that are otherwise blocked in their region. This article provides an in-depth guide on how to configure a Google USA SOCKS5 proxy and how it helps in achieving seamless cross-border access. We will cover the essential steps, potential benefits, and challenges you may encounter during the setup. Understanding Proxies and Their Role in Cross-Border AccessA proxy server acts as an intermediary between your computer and the websites you visit. When you use a proxy, your internet traffic is routed through the proxy server, masking your original IP address and replacing it with the server’s IP. This allows you to appear as if you're browsing from a different location, enabling you to bypass geo-restrictions and access content that is not available in your country.The SOCKS5 proxy protocol, a popular proxy choice, provides additional features, including support for a wider variety of internet protocols, greater flexibility, and enhanced security. It is particularly useful for users who wish to access content from a specific region, such as the USA, without revealing their actual location.Setting Up Google USA socks5 proxy server for Cross-Border AccessTo configure a Google USA SOCKS5 proxy for cross-border access, follow these step-by-step instructions:Step 1: Choose a Reliable SOCKS5 Proxy ServiceBefore you can configure the SOCKS5 proxy, you need to choose a reliable proxy provider. The provider should offer USA-based proxy servers, ensuring that your IP will appear as if you’re browsing from within the United States. Look for providers that offer high-speed connections, robust security features, and consistent uptime to ensure a smooth browsing experience.Step 2: Install a SOCKS5 Proxy ClientAfter selecting your provider, the next step is to install a SOCKS5 proxy client. Many software options are available, and some web browsers even offer built-in proxy configuration settings. The proxy client you choose must support sock s5 proxies. Install the client according to the instructions provided by the proxy provider.Step 3: Configure the SOCKS5 Proxy SettingsOnce the client is installed, the next step is to configure the SOCKS5 proxy settings. Here’s how you can do it:1. Open the proxy client software and navigate to the settings section.2. Select the option to configure a new SOCKS5 proxy server.3. Enter the SOCKS5 server address provided by your proxy provider. This will be the address of the Google USA-based proxy server.4. Enter the username and password if required by the provider. Some services may provide authentication credentials for added security.5. Choose the SOCKS5 protocol from the available options.6. Specify the port number that is required to connect to the proxy server. Commonly used SOCKS5 ports are 1080 or 1081.Step 4: Test the ConnectionAfter configuring the settings, you should test the connection to ensure it works properly. The client software may include a "Test Connection" feature that allows you to check whether your IP address has been successfully masked and redirected through the USA proxy server. If the connection is successful, you’ll be able to browse the internet as if you’re located in the United States.Step 5: Configure Your Web BrowserNext, you need to configure your web browser to use the SOCKS5 proxy. Here's how to do it:1. Open your web browser (Chrome, Firefox, etc.).2. Navigate to the settings menu and find the "Proxy" section.3. Select the option to manually configure the proxy.4. Enter the SOCKS5 server details (address and port) that you configured in your proxy client.5. Save the settings.Once the browser is configured, it will route all your internet traffic through the SOCKS5 proxy, providing you with a USA-based IP address.Benefits of Using a Google USA SOCKS5 Proxy for Cross-Border AccessUsing a Google USA SOCKS5 proxy for cross-border access offers several benefits:1. Access to Geo-Restricted ContentBy connecting to a proxy server located in the USA, you can access content that is only available in the United States. Whether it's streaming services, news websites, or other region-locked resources, the SOCKS5 proxy allows you to bypass geo-blocks and enjoy unrestricted access.2. Enhanced Privacy and AnonymityWhen you use a proxy server, your real IP address is hidden, making it harder for websites to track your browsing habits. This added layer of privacy can be especially important when accessing sensitive content or browsing anonymously.3. Improved SecuritySOCKS5 proxies provide a higher level of security compared to traditional HTTP proxies. The protocol supports a wider variety of protocols and is less susceptible to certain types of cyberattacks. For users concerned about security while browsing, using a SOCKS5 proxy can help mitigate risks.Challenges and Considerations When Using SOCKS5 ProxiesWhile the use of SOCKS5 proxies offers several advantages, there are some challenges and considerations to keep in mind:1. Speed and ReliabilitySome SOCKS5 proxy providers may not offer the same level of speed and reliability as others. It’s important to choose a reputable provider to ensure that the connection speed is adequate for your needs, particularly if you're streaming video or engaging in other high-bandwidth activities.2. Compatibility IssuesNot all websites or services may be compatible with SOCKS5 proxies, and some websites may detect and block proxy traffic. If you face issues with certain services not loading, it may be due to proxy restrictions.3. Security RisksAlthough SOCKS5 proxies provide additional security, using free or low-quality proxies can expose you to data breaches, cyberattacks, and privacy risks. Always ensure that you use trusted and secure proxy services to protect your personal information.Configuring a Google USA SOCKS5 proxy is an effective solution for achieving seamless cross-border access to content that is geo-restricted. By following the setup steps outlined in this article, users can bypass regional restrictions, enhance their privacy, and enjoy a secure browsing experience. However, it’s essential to choose a reliable proxy provider and stay aware of potential challenges, such as speed limitations and compatibility issues. Whether you're accessing media content or browsing securely, a properly configured SOCKS5 proxy can help you navigate the digital landscape without boundaries.

May 29, 2025

blog

Quick detection of Jio proxies banned by target platforms and IP pool refresh strategy

In the digital landscape, Jio proxies are widely used for various online activities such as web scraping, accessing restricted content, and managing multiple accounts. However, these proxies can often get banned by target platforms, leading to disruptions. This article will provide a comprehensive analysis of the strategies to rapidly detect when a Jio proxy is banned and outline the process of refreshing the IP pool to overcome these bans. We will explore the technical details, methods for proactive monitoring, and effective strategies to mitigate the impact of proxy bans. Understanding these strategies is crucial for businesses and individuals relying on Jio proxies for uninterrupted access to digital resources. 1. Understanding Jio Proxies and Their Ban MechanismTo begin, it’s important to understand why Jio proxies are susceptible to being banned. A proxy server acts as an intermediary between a user and the internet, masking the user's real IP address. Jio proxies, specifically those provided by the Jio network in India, are commonly used because of their large IP pool and the ability to bypass geographic restrictions. However, when target platforms detect abnormal activity coming from a particular IP address or range, such as too many requests in a short time, they might flag it and issue a ban.The ban can be triggered by various factors, including:- High volume of requests from a single IP- Requests that violate the terms of service of the platform- Suspicious patterns that suggest automated behavior- Abuse of resources for activities like data scraping or botting2. Rapid Detection of Jio Proxy BanWhen using Jio proxies, rapid detection of a ban is crucial to minimize downtime. The goal is to identify when a target platform blocks access through a specific IP address, allowing for quick action to restore access.There are several methods for detecting when a Jio proxy is banned:2.1 Monitoring Error Codes and ResponsesOne of the first indicators that a proxy has been banned is the receipt of error codes from the target platform. Common HTTP status codes like 403 (Forbidden) or 429 (Too Many Requests) can suggest that the server has detected suspicious activity from the proxy ip. By consistently monitoring the status codes returned by the platform, it’s possible to identify if a proxy has been banned or temporarily restricted.2.2 Performance DegradationAnother sign of a banned proxy is a sudden degradation in performance. This could manifest as slower response times, timeouts, or failures to load content. Regular performance monitoring using automated tools can help detect these anomalies and flag potential proxy issues.2.3 Behavioral Analytics and Anomaly DetectionAdvanced detection methods involve analyzing the traffic patterns and behaviors of the target platform. By setting up algorithms to track changes in traffic behavior, such as a sudden increase in requests or unexpected navigation patterns, it is possible to detect whether a proxy IP has been blocked. Machine learning algorithms and anomaly detection systems can provide proactive alerts when irregularities are detected.3. IP Pool Refresh StrategyOnce a Jio proxy is detected as banned, the next step is to refresh the IP pool to restore access to the platform. An IP pool is a collection of available IP addresses that can be rotated to prevent bans. Refreshing the IP pool involves replacing the banned or problematic IPs with new ones to maintain seamless access.Here are several strategies for refreshing the IP pool effectively:3.1 Dynamic IP Pool RotationDynamic rotation of the IP pool is one of the most effective methods to combat bans. By regularly cycling through the available IP addresses in the pool, users can ensure that no single IP address is overused and detected by the target platform. Setting up a rotation schedule where each IP is used for a limited period before switching can greatly reduce the chances of bans.3.2 Using Residential and Mobile IPsResidential and mobile IP addresses are less likely to be flagged by target platforms compared to data center IPs. This is because they are commonly used by real users. Jio’s mobile IPs, in particular, can offer a more sustainable solution for evading bans. By prioritizing these IP types in the pool refresh strategy, users can minimize the risk of detection.3.3 Implementing Proxy Pool Management ToolsTo streamline the process of managing and refreshing the IP pool, businesses often use proxy pool management tools. These tools allow for automated rotation of proxies, monitoring of proxy health, and reporting of any banned IPs. With integrated features like geolocation filtering and IP reputation analysis, these tools enhance the effectiveness of the IP pool refresh process and provide real-time insights into proxy performance.3.4 Proxy RebalancingIn some cases, users may find that certain IPs in the pool are more likely to be banned due to their excessive use or geographic location. Proxy rebalancing involves redistributing the load across different IPs or regions to ensure that no particular proxy is overloaded. This technique improves the overall success rate of proxy usage and helps to maintain access for extended periods.4. Preventative Measures to Avoid Jio Proxy BansWhile rapid detection and IP pool refresh strategies are crucial for dealing with Jio proxy bans, preventing them in the first place is even more important. There are several measures that can help mitigate the risk of bans:4.1 Mimicking Human BehaviorTo reduce the chances of being flagged by a platform, it’s essential to make the proxy behavior appear as human-like as possible. This can be achieved by introducing randomness in request intervals, using CAPTCHA-solving tools, and simulating typical browsing behavior. By mimicking how a real user would interact with the platform, the likelihood of detection is reduced.4.2 Avoiding High Request VolumePlatforms often flag proxies that generate a high volume of requests within a short time frame. By spacing out requests and controlling the frequency of interactions, the proxy becomes less likely to trigger automatic blocking mechanisms.4.3 Implementing Anti-Detection TechniquesAdvanced users can employ anti-detection techniques to evade platform monitoring systems. Techniques like IP spoofing, changing user-agent strings, and employing VPNs can be used to disguise proxy traffic and make it harder for the platform to identify and ban the IP.In conclusion, the rapid detection of Jio proxy bans and the effective refresh of IP pools are essential for maintaining uninterrupted access to target platforms. By utilizing advanced monitoring methods, rotating IPs dynamically, and implementing preventive measures, businesses and individuals can reduce the impact of bans and continue to operate seamlessly. Additionally, leveraging proxy pool management tools and behavioral analytics ensures a proactive approach to detecting and addressing bans before they disrupt operations. By following these strategies, users can ensure the reliability and sustainability of their Jio proxy usage, even in the face of frequent platform bans.

May 29, 2025

blog

A complete guide to debugging the Google as proxy interface using Postman

In the digital age, APIs have become integral to connecting applications, and Google as a proxy interface is no exception. Postman, a popular API testing tool, is often used for testing APIs, making it an essential tool for developers. This guide provides a step-by-step approach to using Postman to debug the Google as proxy interface, explaining the necessary configurations, the process of setting up requests, and troubleshooting common issues. By the end of this article, you will have a clear understanding of how to use Postman effectively, saving time and enhancing the quality of your development process. Understanding the Basics of Google as Proxy InterfaceBefore diving into the specifics of using Postman, it's important to understand what Google as a proxy interface does and why it is useful. In essence, Google as a proxy refers to the concept of routing your application’s API requests through Google’s infrastructure, which acts as a middleman. This method is commonly used to secure, manage, and optimize API requests between a client and a server. Google offers various proxy services that ensure high availability, performance, and security for your APIs.Postman, on the other hand, provides a user-friendly interface to interact with APIs. It allows developers to test API endpoints, examine responses, and perform debugging tasks. By using Postman to interact with Google’s proxy interface, developers can monitor request flows, troubleshoot potential issues, and ensure that everything is working smoothly.Setting Up Postman for Debugging Google as ProxyThe first step in using Postman to debug Google as a proxy interface is to configure your Postman environment correctly. Follow these steps to get started:1. Create a New Postman Collection: Open Postman and create a new collection for your Google API proxy. This helps you organize your requests and responses effectively. 2. Set Up Authentication: Depending on the security settings of the Google proxy service, you may need to set up authentication credentials such as an API key, OAuth token, or service account. Make sure that you configure these correctly within Postman’s authorization tab.3. Configure Base URL: In the collection or request, set the base URL for the Google proxy service. This URL acts as the entry point for your API requests.4. Set Headers: Depending on the requirements of the Google API, add necessary headers such as `Content-Type`, `Accept`, and `Authorization`. These headers define how the request is processed and the format of the response.Sending Test Requests to the Google ProxyOnce you have configured your Postman environment, the next step is to send test requests to the Google proxy interface. This process helps you identify how the proxy handles incoming requests and what responses are returned.1. Choose the Right HTTP Method: Depending on the operation you want to perform, choose the correct HTTP method (GET, POST, PUT, DELETE, etc.). Each method corresponds to a different type of interaction with the API.2. Enter the Request Parameters: For methods that require parameters (such as GET or POST), enter the necessary data in the request body or query string. This could include data like user IDs, request limits, or search queries.3. Send the Request: Click the “Send” button in Postman to initiate the request. Postman will send the request to the Google proxy and display the response in the interface.4. Inspect the Response: Analyze the returned response, which will include a status code, headers, and the response body. Pay special attention to any error codes or unexpected behavior, which could indicate issues with the proxy configuration.Debugging Common Issues with Google Proxy in PostmanWhen interacting with Google as a proxy service, developers may encounter a range of issues. Postman’s debugging tools help pinpoint these problems and provide a pathway to resolve them. Here are some common issues and how to handle them:1. Authentication Failures: One of the most frequent issues is authentication failure. Ensure that your API keys, tokens, or service account credentials are correct and have the necessary permissions to interact with the Google proxy. Double-check the headers to confirm that the authentication data is correctly added.2. Incorrect Request Format: If the request format is incorrect (e.g., missing headers, incorrect body format), Postman will typically return a `400 Bad Request` response. Make sure you follow the API documentation and structure your requests accordingly.3. Timeouts and Network Issues: If Postman fails to receive a response or times out, check for network connectivity issues or high latency in the proxy service. Adjust the request timeout settings in Postman to see if that resolves the problem.4. Unexpected Response Codes: When debugging the Google proxy, you may encounter unexpected status codes. For example, a `500 Internal Server Error` may indicate a server-side issue with the Google proxy. On the other hand, `403 Forbidden` usually points to permission problems. Investigate these errors by checking the response body and consulting the API documentation for more information.Advanced Techniques for Optimizing Google Proxy DebuggingAs you become more proficient in using Postman for debugging, you can utilize advanced features to streamline your testing process and gain deeper insights into the interactions between your application and the Google proxy interface.1. Automated Tests: Postman allows you to write test scripts that automate the validation of API responses. This feature helps ensure that your Google proxy service is consistently delivering the expected results.2. Environment Variables: Postman’s environment variables allow you to store dynamic values like API keys, tokens, and base URLs, making it easier to switch between different environments (e.g., development, staging, production).3. Monitoring: Use Postman’s monitoring feature to schedule periodic API requests to the Google proxy. This enables you to check the status and health of the proxy over time and be alerted to any issues.4. Collections and Workspaces: Organizing your requests into collections and workspaces allows for better collaboration among team members. You can share collections, export them for documentation, and track changes efficiently.Conclusion: Mastering Postman for Debugging Google ProxyUsing Postman to debug the Google as proxy interface can significantly improve your workflow and help you troubleshoot potential issues with greater ease. By understanding the fundamental concepts of the proxy interface, setting up Postman correctly, sending test requests, and handling common issues, developers can ensure smooth interactions between their applications and Google’s infrastructure. Additionally, utilizing advanced features like automated tests, environment variables, and monitoring can optimize the debugging process and increase efficiency. Whether you are a beginner or an experienced developer, mastering Postman for Google proxy debugging will undoubtedly enhance your development practices and overall productivity.

May 29, 2025

Clicky