Quantum encryption technology has made significant strides in recent years, promising to revolutionize data protection and security systems. As proxy ip services are increasingly used for privacy protection and data masking, understanding the potential impact of quantum encryption on their security is crucial. Quantum encryption leverages the principles of quantum mechanics to enhance cryptography, making traditional encryption methods more vulnerable to breaches. This article delves into how quantum encryption might influence the security of proxy ips, examining both the positive potential and the challenges it poses for future privacy strategies. Introduction to Quantum Encryption and Proxy IP SecurityIn the world of digital security, proxy IPs serve as an essential tool to mask a user's real IP address and provide privacy online. However, the increasing sophistication of cyberattacks and the rise of quantum computing pose new challenges. Quantum encryption technology, which uses quantum keys and quantum entanglement to encrypt data, holds the potential to transform security measures across industries, including proxy IP services.Quantum encryption works on the premise that observing a quantum system disturbs its state, thereby preventing eavesdropping. This could theoretically make communication systems much more secure. However, the rapid development of quantum computing brings a new set of risks to traditional cryptographic techniques, including the encryption methods used by proxy IP services.Impact of Quantum Encryption on Proxy IP SecurityQuantum encryption presents both promising opportunities and substantial risks for the security of proxy IPs.1. Increased Resistance to Conventional Attacks: The implementation of quantum encryption could enhance the security of proxy IP services against conventional hacking attempts. Classical encryption algorithms, such as RSA or AES, rely on computational difficulty for their security. However, quantum computers could break these algorithms by using quantum algorithms like Shor’s algorithm, making traditional encryption methods obsolete. Quantum encryption provides a higher level of resistance against such breaches by using quantum key distribution (QKD) to ensure secure key exchanges.2. Real-Time Security in Proxy IP Networks: One of the major advantages quantum encryption brings to proxy IP security is the ability to establish real-time, unbreakable secure connections. The ability to detect tampering during the key exchange process enables more immediate response to potential attacks, ensuring that the encrypted connection remains intact.3. Future-Proofing Proxy IP Services: With the advent of quantum computing, proxy IP services need to evolve to meet these emerging threats. Quantum encryption could provide a long-term solution to safeguard proxy IP networks, offering encryption methods that are more resilient to quantum decryption techniques. By adopting quantum-resistant algorithms, proxy IP services could effectively mitigate the risks posed by quantum computers, ensuring continued user privacy in the future.Challenges in Integrating Quantum Encryption with Proxy IP SecurityDespite the advantages, several challenges exist when integrating quantum encryption into the existing infrastructure of proxy IP services.1. Cost and Complexity of Quantum Encryption Implementation: One of the primary barriers to quantum encryption is the cost and technical complexity of implementing quantum cryptography systems. Unlike traditional encryption, quantum encryption requires advanced hardware to generate and distribute quantum keys. The current infrastructure of proxy IP providers may not be equipped to handle this level of sophistication, leading to higher implementation costs and the need for significant technological upgrades.2. Limited Availability of Quantum Infrastructure: Quantum encryption relies heavily on the availability of quantum communication infrastructure, which is not yet widely accessible. Quantum key distribution, for instance, requires specialized equipment and infrastructure to operate effectively. Proxy IP services may find it challenging to incorporate quantum encryption into their systems if such infrastructure is not readily available or affordable.3. Interoperability Issues with Existing Cryptographic Protocols: Another challenge is the potential incompatibility between quantum encryption systems and the traditional cryptographic protocols already in use. Many existing proxy IP services use conventional encryption methods that may not be compatible with quantum encryption. This could result in operational inefficiencies and the need for significant upgrades to the security architecture of proxy IP networks.4. Quantum-Specific Security Concerns: While quantum encryption promises to be more secure than classical methods, it is not entirely immune to risks. For instance, quantum systems could be susceptible to new forms of attack that exploit the peculiarities of quantum mechanics. Additionally, the generation and distribution of quantum keys require a high level of precision, and any errors in the process could compromise the integrity of the entire encryption system.The Future of Proxy IP Security in the Quantum EraLooking ahead, the integration of quantum encryption into proxy IP services offers great potential for strengthening privacy and security. As quantum computing continues to evolve, it is likely that hybrid systems, which combine both classical and quantum encryption methods, will emerge to address the challenges and limitations of each approach.1. Development of Quantum-Resistant Protocols: Researchers are already working on developing quantum-resistant cryptographic protocols that could be integrated with existing proxy IP services. These protocols would enable proxy IP providers to safeguard their users from both classical and quantum-based threats, ensuring comprehensive protection in the post-quantum era.2. Collaborative Efforts between Quantum and Cybersecurity Experts: The successful integration of quantum encryption into proxy IP security will require collaboration between quantum physicists, cybersecurity experts, and industry leaders. By working together, they can create robust encryption systems that are not only quantum-safe but also scalable and cost-effective for large-scale use.3. Long-Term Sustainability of Proxy IP Services: As the world moves toward a quantum future, it is crucial for proxy IP providers to stay ahead of emerging trends and technological advancements. Adopting quantum encryption early on could offer a competitive advantage in the cybersecurity market, positioning these services as secure, future-proof solutions for users concerned with privacy.Quantum encryption technology presents both significant opportunities and challenges for the future of proxy IP security. While it offers enhanced protection against traditional cyber threats and provides a path forward for securing communications in the quantum age, the implementation of this technology in proxy IP networks comes with considerable technical, financial, and infrastructure-related hurdles. However, with continued research, development, and collaboration, quantum encryption could ultimately transform proxy IP security, offering more robust and resilient protection for users in an increasingly digital world.
May 30, 2025
Read story
Deploying a scalable HTTP proxy cluster using Docker allows businesses and developers to efficiently manage large amounts of web traffic while ensuring optimal performance and scalability. Docker provides a containerization solution that simplifies the management of the proxy servers in a clustered environment. This approach allows for better resource utilization, easier maintenance, and improved fault tolerance. In this article, we will explore how Docker can be leveraged to deploy a scalable HTTP proxy cluster, its advantages, and the best practices for setting it up and maintaining it effectively. Introduction to HTTP Proxy and DockerAn HTTP proxy is an intermediary server that sits between clients and the web, forwarding client requests to the web servers and returning the responses. The proxy server can provide various benefits such as load balancing, enhanced security, anonymity, and improved performance. It is particularly useful when managing high-volume traffic or when geographical distribution is required.Docker, on the other hand, is a containerization platform that enables applications to run in isolated environments called containers. These containers are lightweight and portable, ensuring that applications can run consistently across different environments. Docker's flexibility allows it to be an excellent choice for deploying scalable HTTP proxy clusters, making it easier to scale, manage, and maintain these clusters.Benefits of Using Docker for HTTP Proxy Clusters1. ScalabilityOne of the key benefits of deploying an HTTP proxy cluster using Docker is scalability. As web traffic increases, businesses need to ensure that their proxy servers can handle the load. Docker makes it easy to scale the proxy cluster horizontally by adding new containers to meet growing demand. Docker Swarm or Kubernetes can manage the orchestration of these containers, ensuring that they are distributed across multiple machines and balanced properly.2. Efficient Resource ManagementDocker containers are lightweight compared to traditional virtual machines, allowing for more efficient use of system resources. This efficiency reduces hardware costs and ensures that the proxy servers run optimally. Docker also offers fine-grained control over resource allocation, such as CPU, memory, and disk space, which is crucial in a high-traffic environment.3. Simplified MaintenanceWith Docker, each proxy server runs in its own isolated container. This isolation simplifies the process of updating and maintaining the system. When an update is required, the affected container can be replaced without impacting the rest of the cluster. Additionally, Docker's built-in versioning system ensures that the correct version of the proxy server is always running.4. Fault Tolerance and High AvailabilityBy deploying multiple proxy servers across different containers, Docker ensures that the system remains highly available even if one or more containers fail. Docker's built-in health checks and monitoring tools can automatically detect failures and restart the affected containers, maintaining the stability of the proxy cluster.5. SecurityDocker provides several security features that enhance the security of the HTTP proxy cluster. Each container runs in an isolated environment, reducing the risk of a security breach affecting the entire system. Additionally, Docker allows for fine-grained control over network configurations, ensuring that sensitive data is protected during transit.Designing a Scalable HTTP Proxy Cluster with Docker1. Choosing the Right Proxy Server SoftwareThe first step in deploying an HTTP proxy cluster is selecting the right proxy server software. There are several options available, including open-source solutions like Squid, HAProxy, and Nginx. Each of these solutions has its own strengths and weaknesses, so it’s important to choose the one that best suits your needs in terms of performance, security, and flexibility.2. Setting Up Docker ContainersOnce the proxy server software is selected, the next step is to set up Docker containers for each instance of the proxy server. Docker provides a simple way to define and configure containers using Dockerfiles. A Dockerfile contains instructions on how to build the container, including installing the proxy server software and configuring it to work with the desired settings.3. Orchestrating the Cluster with Docker Swarm or KubernetesIn order to scale the HTTP proxy cluster, you will need to use an orchestration tool such as Docker Swarm or Kubernetes. These tools manage the deployment, scaling, and monitoring of Docker containers across a cluster of machines. Docker Swarm is easier to set up and is ideal for smaller clusters, while Kubernetes is more powerful and suited for large-scale deployments.4. Configuring Load BalancingTo ensure that traffic is distributed evenly across the proxy servers, load balancing is an essential component of the cluster. Docker makes it easy to set up load balancing with tools like HAProxy or Nginx, which can distribute incoming HTTP requests among multiple proxy server containers based on various algorithms such as round-robin, least connections, or IP hash.5. Monitoring and LoggingEffective monitoring and logging are essential for maintaining the health of the HTTP proxy cluster. Docker provides several monitoring tools, such as Docker stats and third-party tools like Prometheus and Grafana, which allow you to track the performance and resource usage of the containers. Additionally, setting up centralized logging with tools like ELK Stack (Elasticsearch, Logstash, and Kibana) can help you identify and troubleshoot issues in real-time.Best Practices for Maintaining the HTTP Proxy Cluster1. Automate Deployment and ScalingAutomating the deployment and scaling of Docker containers ensures that the proxy cluster can respond to changes in traffic volume without manual intervention. Docker Compose can be used to define multi-container applications, while tools like Jenkins or GitLab CI can automate the process of deploying new containers or updating existing ones.2. Regularly Update and Patch ContainersKeeping the proxy server containers up to date is crucial for security and performance. Regularly checking for updates and patches for the proxy server software and other dependencies will ensure that your system remains secure and efficient.3. Implement Network SegmentationNetwork segmentation is a security best practice that involves dividing the network into smaller subnets. By segmenting the network, you can isolate sensitive components, such as the database or internal services, from the public-facing proxy servers. Docker provides tools to define network policies and ensure secure communication between containers.4. Perform Regular BackupsWhile Docker provides a robust system for managing containers, it is still important to perform regular backups of your configuration files and container data. Backups ensure that you can quickly restore your proxy cluster in case of a failure or disaster.Deploying a scalable HTTP proxy cluster using Docker provides several advantages, including improved scalability, resource management, fault tolerance, and security. By leveraging Docker's containerization capabilities and orchestration tools like Docker Swarm or Kubernetes, businesses can efficiently handle high volumes of web traffic while maintaining optimal performance. Following best practices such as automating deployment, regular updates, and network segmentation ensures the continued success and security of the proxy cluster, making it an invaluable tool for modern web infrastructure.
Jun 03, 2025
Read story
In the evolving world of digital card gaming, especially in the realm of proxy Magic: The Gathering (MTG) cards, multi-user isolation and access control play a crucial role in managing user interactions. Proxy Magic cards are commonly used for online MTG communities to simulate physical cards or represent custom cards without violating copyright regulations. The significance of multi-user isolation and access control in such contexts cannot be overstated, as it allows for a safe, organized, and fair gaming environment. In this article, we will delve deep into these aspects, breaking them down into various layers for a comprehensive understanding. What Is Proxy Magic Cards?Proxy Magic cards are unofficial, replica cards used by players for personal, non-commercial purposes. These cards are often created to replace rare or expensive cards in Magic: The Gathering decks or are used in digital platforms for the sake of gameplay flexibility and innovation. While proxy cards are not used in official tournaments, they offer players the freedom to experiment without the financial burden of purchasing expensive cards. As the digital environment for playing MTG grows, managing how users interact with these proxy cards becomes essential.Understanding the Importance of Multi-User IsolationMulti-user isolation refers to the principle of keeping each user's data, interactions, and experience separate from others within the same system. In the context of proxy Magic cards, multi-user isolation ensures that each player’s deck, card history, and game data remain confidential and protected from unauthorized access. For digital proxy Magic card platforms, isolation is key for several reasons:1. Data Privacy: Players must trust that their game data, including card collections, strategies, and gameplay history, will not be exposed to other users.2. Prevention of Malicious Activity: With isolated user environments, malicious actors attempting to exploit others’ game data or manipulate card systems are kept at bay.3. Fair Play: By isolating users’ game states, one player’s advantage in terms of card collection or gameplay strategies doesn’t interfere with others' experience. This promotes fairness, as no single user can see another's hidden information, such as card choices or hand movements.How Multi-User Isolation Is ImplementedImplementing isolation in proxy Magic card systems involves several technical mechanisms to ensure that each user is shielded from others:1. User Authentication and Authorization: The first layer of isolation is authentication, where users must log in securely using credentials. Once logged in, their identity is used to manage the accessibility of certain features and content. Authorization then assigns the proper permissions for each player, restricting what they can see and do within the platform. This ensures that only authorized users can access certain cards, decks, or game modes.2. Virtual Sandboxing: Another effective method for achieving multi-user isolation is virtual sandboxing. This involves creating a separate virtual space for each user, isolating them from others within the system. By doing so, the platform prevents users from accidentally or intentionally interfering with each other’s game data. Each sandbox is tailored to the specific user’s cards, deck configurations, and game statistics.3. Data Encryption: Data encryption ensures that any sensitive information shared or stored within the platform remains private. Whether it's about a player’s deck or game history, encryption adds an extra layer of security, ensuring that third parties cannot access private data even if they manage to breach the system.Access Control Mechanisms in Proxy Magic Card PlatformsAccess control is equally important in maintaining a secure and fair environment for proxy Magic cards. While isolation focuses on keeping users separate, access control determines who can interact with which resources. It regulates the flow of information and interactions within the system, ensuring that only authorized users can access certain functionalities. The primary access control mechanisms in place include:1. Role-Based Access Control (RBAC): RBAC is a popular method of access control, which assigns roles to users based on their needs and responsibilities. For example, regular players may only be allowed to view and play with a limited set of cards, while administrators may have access to more advanced functionalities, such as editing the card database or overseeing gameplay. By assigning roles, platform owners can enforce specific access levels and prevent unauthorized actions.2. Permission Granularity: More advanced proxy Magic card platforms implement fine-grained permission control. This means that access to specific cards, features, or actions within the platform can be restricted based on user roles, membership level, or even specific card sets. For instance, players in a special tournament might have access to rare proxy cards not available to general users. 3. Audit Trails and Monitoring: Access control also involves monitoring user activities to ensure that the rules are being followed. Regular audits can track user behavior, identify any suspicious activities, and help administrators take corrective actions when necessary. This mechanism also ensures accountability, making it clear who has accessed what information at any given time.Why Multi-User Isolation and Access Control Matter for Proxy Magic CardsEnsuring both isolation and proper access control brings significant benefits to proxy Magic card systems:1. Prevention of Card Duplication or Theft: By keeping users isolated and enforcing strict access control, the system reduces the risk of card theft or duplication, ensuring the integrity of each player’s collection. This is especially important when proxy cards are involved, as players do not want their custom or rare proxies to be copied by others.2. Enhanced User Experience: Players can engage more freely without the fear of interference or unfair advantages. With secure isolation, they can create their decks, experiment with strategies, and enjoy the game in a truly personalized space.3. Compliance with Platform Rules and Legal Boundaries: By isolating users and controlling access, platform administrators can also ensure that the usage of proxy cards stays within legal and ethical boundaries. This minimizes the risk of copyright infringement or exploitation of proxy cards.4. Scalability and Flexibility: Multi-user isolation and access control also contribute to the platform’s scalability. As the user base grows, the system can continue to function efficiently, allowing new users to be added without compromising the security or experience of existing players.Proxy Magic cards represent a powerful tool for enhancing the player experience in Magic: The Gathering. However, as the popularity of digital platforms grows, the need for robust multi-user isolation and access control mechanisms becomes ever more important. These features are essential for protecting players’ data, ensuring fair play, and maintaining the integrity of the platform. By implementing strong isolation protocols and access controls, developers can create secure, fair, and enjoyable gaming environments for all users, paving the way for a thriving and sustainable digital card gaming ecosystem.
Jun 11, 2025
Read story
In today’s digital era, online privacy and security have become paramount concerns for users worldwide. One of the key tools that enhance internet browsing experience and ensure better protection is the use of proxy web browser extensions and their customization options. Proxy web browser extensions offer a seamless way to hide a user's IP address, protect personal information, and bypass geographical restrictions. Customization solutions take these extensions a step further, allowing businesses and individuals to tailor proxy settings to their specific needs. This article will delve into the benefits of proxy web browser extensions, the importance of customization, and how these tools can be effectively used to secure online activities. Understanding Proxy Web Browser ExtensionsA proxy web browser extension is a software component integrated into web browsers such as Chrome, Firefox, or Safari. Its primary function is to route the user’s internet traffic through a remote server (a proxy server), which acts as an intermediary between the user and the websites they visit. This process masks the user's IP address and encrypts data, making it more challenging for third parties to track or monitor online activities.The advantages of using proxy extensions are numerous. First and foremost, they offer anonymity and privacy protection by hiding the user's real IP address. For individuals concerned about their online footprint, proxy extensions provide an essential layer of security. Furthermore, users can access websites or content that may be restricted in their region. By connecting to servers in different countries, individuals can bypass geographical restrictions and enjoy a more open and unrestricted internet.Key Benefits of Proxy Web Browser Extensions1. Privacy and Security Enhancement Proxy extensions help maintain online privacy by hiding the user’s real IP address. This means websites and advertisers cannot track browsing activities as easily. Additionally, using a proxy server encrypts the data transmission, further reducing the risk of hacking or data theft, especially when using public networks.2. Bypassing Geographical Restrictions Many websites, streaming services, or platforms restrict content based on the user’s geographical location. Proxy extensions enable users to connect to servers in different countries, effectively bypassing these geographical restrictions. This is especially useful for accessing international content on streaming platforms or for users living in countries with strict internet censorship.3. Faster Browsing Experience Although proxies generally route traffic through a remote server, certain advanced proxy extensions can also improve browsing speed by caching data. Frequently accessed content can be retrieved faster, reducing load times on websites. This is beneficial for users who rely on fast internet speeds for work or entertainment.4. Ad and Tracker Blocking Some proxy extensions include built-in ad-blockers and tracker prevention features. This reduces the number of intrusive ads and tracking scripts that slow down browsing and violate privacy. By blocking unwanted content, proxy extensions contribute to a smoother, more enjoyable online experience.Customization of Proxy Web Browser ExtensionsWhile the default proxy settings in most browser extensions are sufficient for general users, customization solutions offer businesses and advanced users the ability to fine-tune their proxy settings according to specific requirements. Customization features can range from selecting proxy servers in different countries to setting up rules for different types of websites. Below are some of the key customization options available:1. Location-Based Proxy Selection One of the most useful features of proxy extensions is the ability to choose a proxy server located in a specific country. Customization allows users to select servers in countries where access to specific content or services is needed. For instance, if a user wishes to view content restricted to users in the United States, they can choose a proxy server in the U.S. to simulate browsing from that location.2. IP Rotation Many proxy services offer IP rotation as a customization option. This feature helps maintain anonymity by frequently changing the user’s IP address while browsing. For businesses dealing with sensitive data or individuals who require high privacy levels, IP rotation prevents tracking by making it difficult for websites to associate activities with a single user.3. Custom Proxy Rules Advanced users or businesses often require a more granular level of control over their proxy configurations. With custom rules, users can set up specific proxy behavior based on different criteria. For example, certain websites can be configured to always route traffic through a proxy server, while others can be exempted. This ensures that users have flexibility in how they use proxy servers for different tasks.4. Bandwidth and Speed Management Proxy extensions can also be customized to manage bandwidth and optimize speed. For businesses that require a large amount of data transfer or fast browsing speeds, selecting proxies that offer high bandwidth or low latency can improve performance. These options can be tailored depending on the user’s needs, ensuring that browsing remains efficient and effective.Practical Applications of Proxy Web Browser ExtensionsThe customization of proxy web browser extensions is particularly valuable in several real-world scenarios. Here are some practical applications where these tools provide substantial benefits:1. Corporate Security For businesses that handle sensitive data, ensuring security and privacy is crucial. Custom proxy settings can be used to safeguard corporate networks from potential cyber threats by hiding the company’s internal IP addresses and encrypting traffic. Additionally, businesses can use proxies to limit access to internal resources, ensuring that only authorized personnel can access critical information.2. Digital Marketing and SEO Digital marketers and SEO professionals often use proxy extensions to conduct competitor analysis, monitor online activity, and perform keyword research. By using proxies, marketers can avoid being blocked or tracked by websites while accessing data from different geographical locations. Custom proxies can also help in simulating users from various regions, allowing for more accurate SEO testing and market research.3. Content Streaming Streaming services often block access to content based on a user’s location. Proxy extensions with customization options enable users to access international content by connecting to proxy servers in different regions. This is particularly beneficial for users who wish to access services like Netflix, Hulu, or BBC iPlayer, which have geographically restricted libraries.4. Bypassing Government Censorship In countries where internet censorship is prevalent, proxy web browser extensions offer a way to bypass government restrictions. By selecting a proxy server located outside the country, users can access websites and services that are otherwise blocked or heavily monitored. This helps maintain access to free and open information, especially for individuals living in authoritarian regimes.In conclusion, proxy web browser extensions, combined with their powerful customization options, offer significant benefits for enhancing online privacy, security, and accessibility. Whether you are an individual seeking to protect personal data, a business aiming to secure sensitive information, or a user trying to access restricted content, these tools provide practical solutions. Customization allows for greater control, enabling users to tailor their proxy settings to meet specific needs, whether it’s improving browsing speed, managing bandwidth, or bypassing geographical restrictions. As the digital landscape continues to evolve, proxy web browser extensions will remain an essential tool for secure and efficient online activities.
Jun 12, 2025
Read story
In today's digital landscape, maintaining privacy, security, and anonymity is more crucial than ever. One effective way to do this is by using a socks5 proxy server, which acts as an intermediary between a user's device and the internet. By using a VPS (Virtual Private Server) to host a SOCKS5 proxy, users can control their own proxy server, making it both cost-effective and customizable. In this guide, we'll explore the step-by-step process of installing and configuring a socks5 proxy server on a VPS. Whether you want to improve browsing privacy, circumvent geo-restrictions, or enhance security, this article will provide the insights and instructions needed to get you up and running. Understanding SOCKS5 and Why Use It?Before diving into the installation process, it's important to understand what SOCKS5 is and why it might be a better option compared to other proxy types.SOCKS5 Proxy Overview SOCKS5 is an advanced version of the SOCKS (Socket Secure) protocol that provides a secure and flexible connection between a client (user) and a server. Unlike HTTP proxies that are designed specifically for web traffic, SOCKS5 can handle any type of internet traffic—whether it's HTTP, FTP, or even torrenting. This versatility makes it highly desirable for users who need to route various types of data through a proxy server. Why Use SOCKS5? 1. Privacy and Anonymity: By masking your IP address, SOCKS5 helps protect your identity online, preventing websites and services from tracking your activity.2. Bypass Geo-Restrictions: With a SOCKS5 proxy, you can easily access content that may be restricted in your region by routing your connection through a server located in a different geographical area.3. Enhanced Security: SOCKS5 offers better security compared to its predecessors. It supports encryption, which helps protect your data while it's in transit.4. Faster Speeds: SOCKS5 does not modify data packets, allowing faster speeds than other proxy protocols.With these benefits in mind, let's walk through the process of setting up a SOCKS5 proxy server on your VPS.Step 1: Setting Up Your VPSTo begin, you need a VPS (Virtual Private Server) to host your SOCKS5 proxy. If you don’t already have one, you'll need to purchase a VPS from a hosting provider. Popular choices include Linux-based VPSs like Ubuntu, CentOS, or Debian, as they are widely supported and easy to configure.1. Choose Your VPS Provider You can choose from a range of hosting providers offering Linux VPS services. Most VPS services allow you to choose from various server locations worldwide, which is a useful feature for routing traffic through different geographical regions.2. Access Your VPS Once you've purchased your VPS, you'll be given login credentials. Use an SSH (Secure Shell) client to access your server. For example, if you're using a Linux or Mac computer, open your terminal and type: ``` ssh username@your-vps-ip-address ``` On Windows, you can use software like PuTTY to access the VPS.Step 2: Installing Required SoftwareThe next step is installing the necessary software to run the SOCKS5 proxy server. For this tutorial, we'll use Dante—a powerful and easy-to-use proxy server software for Linux systems.1. Update Your System First, ensure your VPS is up-to-date by running the following command: ``` sudo apt update && sudo apt upgrade ```2. Install Dante Server To install Dante, run the following command: ``` sudo apt install dante-server ``` Dante is the package that will allow your VPS to function as a SOCKS5 proxy server.Step 3: Configuring the SOCKS5 Proxy ServerOnce the Dante package is installed, it’s time to configure the proxy server. Dante uses a configuration file, typically located at `/etc/danted.conf`.1. Open the Configuration File Open the Dante configuration file using a text editor like nano: ``` sudo nano /etc/danted.conf ```2. Basic Configuration Settings Here's an example of a basic configuration: ``` logoutput: /var/log/danted.log internal: eth0 port = 1080 external: eth0 method: username none user.notprivileged: nobody clientmethod: none socksmethod: username client pass { from: 0.0.0.0/0 to: 0.0.0.0/0 log: connect disconnect error } ``` - `internal`: This is the internal network interface (eth0 in this example) and port (1080) on which the proxy will listen. - `external`: This is the network interface through which the server will communicate with the internet. - `method`: This specifies the authentication method for the proxy. In this example, `none` means no authentication, but you can change this to `username` for more secure setups. - `clientmethod`: This defines how clients connect to the proxy.3. Save and Exit After making changes to the configuration file, save and exit the editor. In nano, this is done by pressing `CTRL + X`, then `Y`, and finally `Enter`.Step 4: Restarting the Proxy ServerAfter configuring the server, restart the Dante service to apply the changes:```sudo systemctl restart danted```To ensure that the service starts automatically when the VPS reboots, use the following command:```sudo systemctl enable danted```Step 5: Testing Your SOCKS5 Proxy ServerNow that your SOCKS5 proxy is up and running, it’s time to test it to ensure it's functioning correctly.1. Test Locally To check if the proxy server is listening on the specified port (1080), run: ``` sudo netstat -tuln | grep 1080 ``` You should see an output indicating that the server is listening on port 1080.2. Testing with a Browser or Application To test the proxy server, you can configure a web browser (such as Firefox or Chrome) or any other application to use the proxy. In Firefox, for example, navigate to `Preferences` > `Network Settings` > `Manual Proxy Configuration` and input your VPS IP address and port (1080). Once configured, try browsing the web to confirm the proxy is functioning as expected.Step 6: Optional – Securing Your Proxy ServerWhile the default configuration allows anyone to connect to your proxy server, this might not be ideal for security reasons. You can restrict access to specific IP addresses or configure user authentication.1. Restrict Access by IP You can modify the configuration to restrict access to a specific IP range. For example: ``` client pass { from: 192.168.1.0/24 to: 0.0.0.0/0 log: connect disconnect error } ``` This will only allow clients from the IP range `192.168.1.0/24` to use the proxy.2. Enable Username Authentication For more security, you can require users to authenticate by setting up a username and password: ``` method: username socksmethod: username ``` After making these changes, users will need to provide a username and password to use the proxy.ConclusionSetting up a SOCKS5 proxy server on a VPS is a powerful way to ensure your privacy, enhance security, and bypass geo-restrictions. By following the steps outlined in this guide, you can have a fully functional SOCKS5 proxy server running in no time. Whether you need it for personal use or as a business solution, the flexibility and security provided by SOCKS5 make it a great choice for anyone looking to maintain control over their online privacy.
Jan 13, 2025
Using a proxy server is one of the most effective ways to enhance your online privacy and security. When it comes to Skype, a popular communication application, setting up and connecting through a socks5 proxy can offer benefits such as bypassing geo-restrictions, improving security, and ensuring anonymity. This article will walk you through the steps required to set up and configure Skype to connect to a Socks5 proxy. By the end, you will understand how to safely and effectively use a proxy with Skype, providing you with greater control over your online activities. Understanding Socks5 Proxy and Its Benefits for SkypeBefore diving into the steps of configuring Skype, it's essential to understand what a Socks5 proxy is and how it can benefit your use of Skype.A Socks5 proxy is a type of internet protocol that allows you to route your internet traffic through a remote server. This can be especially useful when you need to mask your IP address, access region-locked content, or improve your online privacy. Unlike other proxy types, socks5 proxies do not modify your data in any way, making them more versatile and reliable for handling various types of internet traffic, including VoIP (Voice over Internet Protocol) services like Skype.For Skype, using a Socks5 proxy can help in:1. Improved Security: Socks5 proxies ensure that your connection is secure by masking your real IP address.2. Bypassing Restrictions: In some regions, Skype services might be restricted or throttled. A Socks5 proxy can help bypass these restrictions.3. Enhanced Privacy: With a proxy, your actual location and IP address remain hidden, offering better anonymity during calls and chats.Prerequisites for Setting Up Skype with a Socks5 ProxyBefore you begin the configuration process, ensure you meet the following prerequisites:1. A Stable Internet Connection: This is essential for both the proxy setup and the uninterrupted use of Skype.2. Socks5 Proxy Information: You will need the proxy server’s IP address, port number, username, and password (if authentication is required).3. Skype Installed on Your Device: Make sure you have the latest version of Skype installed on your device (PC, Mac, or mobile).Step-by-Step Guide to Configuring Skype with a Socks5 ProxyHere are the detailed steps you need to follow in order to configure Skype with a Socks5 proxy:1. Open Skype SettingsThe first step is to access the Skype settings. To do so:- Launch the Skype application on your device.- Log into your account.- Click on your profile picture or the menu icon in the top-left corner.- From the dropdown menu, select Settings.2. Navigate to Advanced Network SettingsOnce you're in the Skype settings menu:- Look for the General Settings or Network Settings section.- Select Advanced or Connection Settings (this can vary slightly depending on your version of Skype).- In this section, you'll find the option to configure proxy settings.3. Enable Proxy ConfigurationNow, you will need to enable the use of a proxy server:- Look for a section titled Proxy Settings or Connection via Proxy.- Select the option to configure a proxy manually.- From the available proxy types, choose Socks5 as your preferred proxy protocol.4. Enter Proxy Server InformationAt this point, you’ll need to input the proxy server details that you have obtained. This includes:- Proxy Server Address (IP or Hostname): The address of the socks5 proxy server you want to connect to.- Port Number: The port through which the proxy connection will occur (commonly, this is 1080 for Socks5 proxies).- Username and Password (if required): If the proxy server requires authentication, input the credentials here.Double-check the information to ensure accuracy before proceeding to the next step.5. Save and Apply the SettingsOnce all the details are entered correctly:- Click on Save or Apply to confirm the changes.- You might need to restart Skype for the settings to take effect properly.6. Test the ConnectionAfter configuring the proxy, it’s important to test the connection:- Try making a Skype call or sending a message to verify that Skype is working properly through the Socks5 proxy.- If you experience issues, double-check the proxy settings or verify that the proxy server is active and functioning correctly.Troubleshooting Common IssuesWhile connecting Skype to a Socks5 proxy is generally straightforward, you may encounter a few common issues. Here’s how to troubleshoot them:1. Skype Not Connecting- Check the Proxy Details: Ensure that the IP address, port number, and authentication credentials (if required) are correct.- Firewall Settings: Make sure that your firewall or antivirus is not blocking the proxy connection.- Test with Other Apps: If other applications are also not connecting through the proxy, the issue may lie with the proxy server itself.2. Slow or Poor Connection Quality- Check Proxy Server Load: A heavily loaded proxy server may slow down your connection. You might want to try using a different server.- Test Speed Without Proxy: To verify that the proxy is causing the slowdown, temporarily disconnect from the proxy and test your connection speed.3. No Access to Skype Features- Check Skype Version: Make sure you're using the latest version of Skype, as older versions may have compatibility issues with proxies.- Proxy Compatibility: Some proxies may not support certain features of Skype (such as video calls). If this happens, consider using another Socks5 proxy server.Alternative Methods to Configure Skype with a Socks5 ProxyIf you cannot configure Skype to use a Socks5 proxy directly, you can try other methods:1. Using a Third-Party VPN or Proxy ClientA third-party VPN or proxy client allows you to route all of your internet traffic, including Skype, through a proxy server. Many VPN services offer the ability to configure a Socks5 proxy connection. Once the VPN or proxy client is set up, you can use Skype as usual without manually adjusting its proxy settings.2. Configuring System-Wide Proxy SettingsIn some cases, you may prefer to configure a Socks5 proxy on your operating system itself. By doing so, all applications—including Skype—will automatically use the proxy. This method can be helpful if you don’t want to adjust the proxy settings for each app individually.ConclusionSetting up and connecting Skype to a Socks5 proxy can significantly improve your privacy, security, and access to restricted content. By following the steps outlined in this guide, you can easily configure Skype to route its traffic through a Socks5 proxy. Although there may be occasional troubleshooting or compatibility issues, a proxy setup can help you enjoy a more secure and anonymous Skype experience. Whether for bypassing geographical restrictions or protecting your identity, the benefits of using a Socks5 proxy with Skype are clear.
Jan 13, 2025
In an increasingly connected world, privacy and anonymity have become paramount. One of the most effective ways to safeguard your online activity is by using tools like VPNs (Virtual Private Networks) and socks5 proxies. These two technologies are commonly used in tandem to create a powerful privacy shield, but to fully maximize their potential, it’s essential to implement dual detection techniques. By understanding how both VPN and Socks5 proxies function and the best practices for configuring them, you can ensure that your digital footprint is as minimized as possible, even in environments where surveillance and data collection are rampant. This article will explore how combining VPN and socks5 proxy technologies with proper dual detection mechanisms can significantly enhance your online privacy. 1. Understanding VPNs and Socks5 ProxiesBefore delving into the specifics of dual detection, it's essential to have a clear understanding of how VPNs and Socks5 proxies work individually.- VPN (Virtual Private Network): A VPN is a service that creates an encrypted tunnel between your device and a remote server, typically located in a different geographical location. It hides your IP address, making it appear as though your internet activity is originating from the VPN server rather than your actual location. It also encrypts your data, ensuring that anyone attempting to intercept your traffic cannot easily access or decipher your information.- Socks5 Proxy: A Socks5 proxy, on the other hand, routes your internet traffic through a proxy server but without the encryption of a VPN. Unlike traditional HTTP proxies, Socks5 supports a broader range of protocols and can handle any type of internet traffic (including peer-to-peer connections). Socks5 proxies work at a lower level than VPNs, so while they can mask your IP address, they don’t offer the same level of security as a VPN.Both VPNs and Socks5 proxies are powerful tools for enhancing privacy, but they serve slightly different purposes and work in different ways.2. Why Use Both VPN and Socks5 Proxy Together?When used together, VPNs and Socks5 proxies can complement each other to offer a multi-layered approach to online privacy. Here's why:- Layered Protection: A VPN alone offers excellent security by encrypting your traffic and masking your IP address. However, some users may wish to add an additional layer of obfuscation. By using a Socks5 proxy in conjunction with a VPN, you can effectively hide the VPN server's IP address from any external observer. This makes it harder to trace your activities, even if the VPN server is compromised.- Performance Boost: In some cases, a Socks5 proxy can offer better performance for certain types of internet activity (such as torrents or peer-to-peer file sharing) compared to a VPN. This is because Socks5 is less resource-intensive, meaning that it could potentially help improve connection speeds, especially if your VPN provider is slowing things down due to encryption overhead.- Bypassing Restrictions: A VPN can help you bypass geographical restrictions or censorship, but using a Socks5 proxy can provide an additional layer to evade detection from more advanced methods of traffic analysis. This combination can make it harder for authorities or websites to identify or block your traffic.By combining both technologies, you enhance your privacy and security in ways that neither can achieve individually.3. The Importance of Dual Detection in Privacy ProtectionDual detection refers to the practice of ensuring that both the VPN and Socks5 proxy are configured and monitored to prevent any data leakage or traceable activity. The effectiveness of this dual-layer protection hinges on rigorous detection techniques that keep both components in check.- Leak Protection: VPNs, while offering encryption, are not foolproof. Sometimes, they can leak your real IP address due to DNS leaks, WebRTC leaks, or other vulnerabilities. Socks5 proxies can also be vulnerable to similar leaks. By actively detecting and preventing these leaks, you can ensure that your real IP address remains hidden. You need to regularly check for IP and DNS leaks when using both VPN and Socks5 proxies to ensure your traffic remains anonymous.- Traffic Analysis: Dual detection techniques also involve the analysis of traffic patterns. Since both VPN and Socks5 proxies reroute traffic, malicious actors might attempt to analyze these patterns and break through the layers of security. By monitoring for unusual or identifiable traffic signatures, you can ensure that your usage doesn’t stand out as anomalous and potentially trigger flags for surveillance.- End-to-End Encryption Validation: The success of using a VPN and a Socks5 proxy together also relies on ensuring that your data remains encrypted throughout its journey. End-to-end encryption ensures that your data cannot be intercepted or manipulated, even by your VPN provider or the socks5 proxy server. Regular checks and validation of your encryption protocols can help ensure your data remains secure.4. Practical Steps for Implementing Dual DetectionHere are practical ways you can ensure that your VPN and Socks5 proxy work seamlessly together for optimal privacy protection:- Use DNS and WebRTC Leak Test Tools: Many websites offer DNS leak tests and WebRTC leak tests. These tools help you identify whether your real IP address is being exposed, even when using a VPN or Socks5 proxy. Regularly check these tests when connecting to the internet to ensure that no leaks are occurring.- Use a VPN with Strong Leak Protection Features: Select a VPN that offers built-in leak protection features. These features include automatic DNS leak protection and WebRTC blocking. This minimizes the chance that your real IP will be exposed, even if your VPN connection drops.- Configure Proxy to Avoid DNS Resolution on Local Machine: Ensure that your Socks5 proxy is configured so that DNS queries do not happen on your local machine but are instead routed through the proxy. This prevents any DNS leaks from revealing your real location.- Check for Consistent IP Address Masking: Make sure both the VPN and Socks5 proxy are masking your IP address. You can use online IP checkers to verify the IP address displayed when you’re connected through both services. The displayed IP should correspond to the VPN server or proxy server, not your actual IP.- Avoid Split Tunneling: Some VPNs offer a feature called split tunneling, where only specific traffic is routed through the VPN while other traffic bypasses it. For privacy reasons, it's advisable to disable split tunneling when using both a VPN and a Socks5 proxy to ensure all your traffic is protected.5. Challenges and ConsiderationsWhile dual detection of VPN and Socks5 proxies offers enhanced privacy, there are a few challenges and considerations to be aware of:- Increased Complexity: Configuring both a VPN and Socks5 proxy for maximum privacy can be more complex than using either one individually. It requires technical expertise and a deep understanding of how both technologies work together.- Performance Issues: Using both a VPN and a Socks5 proxy may reduce connection speeds, especially if you're using servers located far from your actual location. Some trial and error may be needed to find the optimal setup.- Risk of Misconfiguration: Misconfiguring either the VPN or the Socks5 proxy can lead to potential privacy leaks. It’s crucial to stay informed about how to properly configure and test both services regularly.ConclusionEnsuring online privacy in the digital age is an ongoing challenge, especially as technology evolves and surveillance methods become more sophisticated. By using both VPN and Socks5 proxies, you create a robust, layered defense against privacy intrusions. However, to truly maximize the benefits of these tools, dual detection mechanisms must be in place. Regular checks for leaks, traffic analysis, and proper configuration can safeguard your privacy, making it significantly more difficult for anyone to trace your online activities. With the right implementation and vigilance, this combination can offer a high level of protection, making your online presence truly anonymous.
Jan 13, 2025
When it comes to securing internet traffic and bypassing geographical restrictions, socks5 proxies are often used. They work by rerouting your internet requests through an intermediary server, making your online activities appear to come from the proxy server rather than your actual location. One simple and effective way to create a temporary socks5 proxy is by using SSH (Secure Shell) tunneling. SSH allows secure communication over a network and can be easily configured to forward your traffic through a remote server. In this guide, we will walk you through the step-by-step process of setting up an SSH-based SOCKS5 proxy that can be used for enhanced privacy and access to restricted content. Understanding the Basics of SOCKS5 and SSHBefore diving into the setup, it’s important to understand the basic concepts of SOCKS5 proxies and SSH. SOCKS5 is the fifth version of the SOCKS protocol, which is primarily used for routing network traffic through a proxy server. It is capable of handling multiple types of traffic such as TCP, UDP, and others, and unlike HTTP proxies, it doesn’t modify the data that passes through it, ensuring better privacy and speed.On the other hand, SSH is a protocol used to securely connect to remote servers, typically for managing servers or transferring files. SSH supports tunneling, which allows you to route your internet traffic securely through a remote server, making it a perfect tool for creating a temporary SOCKS5 proxy. This setup is often used for bypassing firewalls or enhancing security when using public Wi-Fi.Step 1: Requirements for Setting Up a Temporary SOCKS5 ProxyBefore you can start, you need a few prerequisites:1. Remote Server: You will need access to a remote server that supports SSH. This could be a cloud-based server or a VPS (Virtual Private Server). 2. SSH Client: You will also need an SSH client installed on your local machine. On Linux or macOS, the SSH client is usually pre-installed. Windows users can use applications like PuTTY or the built-in SSH client in Windows 10 and later. 3. Terminal/Command Line Access: Knowledge of how to use the command line (Terminal on macOS/Linux or Command Prompt/PowerShell on Windows) is necessary for the configuration.4. Proxy Configuration: Once the SSH tunnel is established, you need to configure your local applications or web browsers to use the SOCKS5 proxy.Step 2: Establishing an SSH Tunnel for SOCKS5 ProxyThe first and most critical step in setting up your SOCKS5 proxy is establishing the SSH tunnel. This can be done using the following command:On Linux/macOS:```ssh -D 1080 -C -N -f username@remote_server_ip```Here’s a breakdown of the command:- `-D 1080`: This specifies the local port (1080 in this case) that the SOCKS5 proxy will listen on. You can choose any available port number, but 1080 is the most common default.- `-C`: This option enables compression, improving the speed of your tunnel by reducing the amount of data transmitted.- `-N`: This option tells SSH not to execute any commands on the remote server, making it useful for just tunneling.- `-f`: This option tells SSH to go into the background after authentication.On Windows (using PowerShell or Command Prompt), the command will be very similar:```ssh -D 1080 -C -N username@remote_server_ip```After entering the command, you will be prompted to enter the password for the remote server (unless you’ve set up SSH keys for passwordless authentication). Once authenticated, the SSH tunnel will be established, and the SOCKS5 proxy will be ready to use.Step 3: Configuring Applications to Use the SOCKS5 ProxyAfter the SSH tunnel is set up, the next step is to configure your applications to use the SOCKS5 proxy. The process will vary slightly depending on the application, but for web browsers and other network tools, it’s generally straightforward.For Firefox:1. Go to Preferences or Options.2. Scroll down to Network Settings and click Settings.3. Select Manual proxy configuration.4. In the SOCKS Host field, enter `localhost` or `127.0.0.1` and set the port to `1080` (or whatever port you specified in the SSH command).5. Choose SOCKS v5 and click OK.For Google Chrome (using a flag):1. Close all Chrome windows.2. Open Chrome with the following command: ``` chrome.exe --proxy-server="socks5://127.0.0.1:1080" ``` This will configure Chrome to use the SOCKS5 proxy that you’ve set up.For System-wide Configuration:On Linux and macOS, you can configure the entire system to use the SOCKS5 proxy. This requires modifying system proxy settings, which varies based on the operating system version. Tools like `proxychains` or `tsocks` can also help force network traffic to use the proxy.Step 4: Testing Your SOCKS5 ProxyOnce everything is set up, it’s important to test whether your SOCKS5 proxy is functioning correctly. You can check the effectiveness of your proxy by visiting websites that display your IP address (such as "WhatIsMyIP.com"). If the proxy is working correctly, the IP address displayed should be that of the remote server, not your local machine.You can also use curl or wget in the terminal to test:```curl --socks5 127.0.0.1:1080 http://pyproxy.com```If the request goes through without issues, your SOCKS5 proxy is working correctly.Step 5: Terminating the SOCKS5 ProxyOnce you are done using the SOCKS5 proxy, it’s important to terminate the SSH tunnel to stop the proxy from running. To do this, simply find the process ID (PID) of the SSH session and kill it.On Linux/macOS:1. Find the SSH process by using the command: ``` ps aux | grep ssh ```2. Kill the process using its PID: ``` kill ```On Windows, you can close the SSH client application or terminate the process via Task Manager.Advantages of Using SSH for Temporary SOCKS5 ProxySetting up a SOCKS5 proxy via SSH offers several key advantages:- Security: SSH is an encrypted protocol, so all traffic routed through the SSH tunnel is encrypted, ensuring privacy and data security.- Ease of Use: The setup process is relatively simple and doesn’t require third-party software or complex configurations.- Temporary Setup: Since the tunnel can be easily started and stopped, this method is ideal for temporary needs without leaving a long-lasting footprint.- Bypass Restrictions: Using a remote server, you can access geo-restricted or firewall-protected content, as it appears that the traffic is originating from the remote server.ConclusionSetting up a temporary SOCKS5 proxy using SSH is a powerful way to enhance your online privacy and bypass network restrictions. By following the steps outlined in this guide, you can quickly and easily create a secure and private browsing environment. Remember to terminate the SSH tunnel when you're done to ensure that no unwanted traffic is routed through the proxy. Whether you’re accessing restricted content or just want an extra layer of security, SSH tunneling for SOCKS5 is an efficient and reliable solution.
Jan 13, 2025
Setting up a socks5 proxy server on a cloud VPS is a powerful solution for enhancing online privacy, bypassing geographical restrictions, and securing internet traffic. A socks5 proxy server works by routing your internet traffic through a remote server, allowing you to mask your IP address and maintain anonymity. This article will guide you through the step-by-step process of setting up a SOCKS5 proxy server on your cloud-based VPS, making it accessible for various applications like secure browsing, accessing restricted content, and more. By the end of this guide, you will understand the essential configuration steps and security practices required to run a SOCKS5 proxy on your VPS efficiently. What is a SOCKS5 Proxy?A SOCKS5 proxy is a protocol that allows clients to connect to the internet through a remote server. Unlike HTTP or HTTPS proxies, SOCKS5 handles any kind of internet traffic, whether it’s web browsing, file sharing, or streaming. SOCKS5 is more flexible and can handle a wide variety of traffic without modification. It supports advanced authentication mechanisms and offers an extra layer of security over other proxies, especially when combined with encryption.This protocol is popular for its low-latency and high-performance capabilities. It works by acting as an intermediary between the client (the end-user) and the destination server, ensuring that all traffic is redirected securely through the proxy server. It is ideal for users looking for secure, anonymous, and unrestricted access to the internet.Why Use SOCKS5 Proxy on a Cloud VPS?Using a cloud VPS to host a SOCKS5 proxy server provides numerous advantages:1. Enhanced Privacy and Anonymity: When using a SOCKS5 proxy, your real IP address is hidden, and the destination server sees the IP of your VPS. This ensures anonymity and privacy while browsing. 2. Access to Geo-Restricted Content: Many websites and services restrict access based on geographic location. A SOCKS5 proxy can help bypass such restrictions by routing your traffic through a server located in a different region.3. Security: The SOCKS5 protocol offers strong encryption and authentication features, ensuring that your connection remains private and secure. This is especially important when connecting to public networks or using untrusted internet connections.4. Low Latency and High-Speed Performance: SOCKS5 is lightweight, which means it introduces minimal overhead, resulting in faster speeds compared to other proxy types.5. Control and Customization: Hosting your own SOCKS5 server gives you full control over configuration and customization, ensuring that it meets your exact needs.Step-by-Step Guide to Setting Up a SOCKS5 Proxy Server on a Cloud VPSNow, let’s go through the essential steps to set up a SOCKS5 proxy server on your cloud VPS. For this guide, we will use a Linux-based VPS running Ubuntu, but the general process is similar for other Linux distributions.1. Preparing the VPSBefore starting the installation process, ensure that your VPS is properly set up and running. You need:- A cloud VPS running Ubuntu 20.04 or later.- SSH access to the VPS for remote configuration.- Sudo privileges to install software and make system-level changes.Once you have access to your VPS, make sure the system is updated to avoid issues with outdated packages.```bashsudo apt updatesudo apt upgrade -y```2. Installing the SOCKS5 Proxy Server SoftwareThe most popular tool for setting up a SOCKS5 proxy server is Dante, a versatile and efficient software package for managing SOCKS proxies. To install Dante on your VPS, use the following commands:```bashsudo apt install dante-server```This command will install Dante and all necessary dependencies. After the installation is complete, you can begin the configuration process.3. Configuring the SOCKS5 ServerNow that Dante is installed, you need to configure it to act as a SOCKS5 proxy. The configuration file is typically located at `/etc/danted.conf`. Open it using a text editor:```bashsudo nano /etc/danted.conf```Here is an example of a basic configuration for a SOCKS5 proxy server:```logoutput: /var/log/danted.loginternal: eth0 port = 1080external: eth0method: username noneuser.notprivileged: nobodyclientmethod: nonesocketblocksize: 8192```- logoutput: Specifies the log file where the server logs will be stored.- internal: Specifies the network interface and port for the SOCKS5 server to listen on (default is 1080).- external: Defines the network interface used for outgoing connections.- method: Defines the authentication method. In this case, "none" allows anonymous connections. You can use other authentication methods like "username" if needed.- user.notprivileged: Specifies a non-privileged user to run the proxy service.- clientmethod: Controls client-side authentication; set to "none" if not required.- socketblocksize: Defines the buffer size for socket connections.Once you've configured the settings, save and close the file.4. Starting and Testing the Proxy ServerNow that the configuration file is set up, you can start the Dante SOCKS5 proxy server:```bashsudo systemctl start dantedsudo systemctl enable danted```You can check the status of the service to ensure it's running smoothly:```bashsudo systemctl status danted```To test the proxy server, you can use tools like curl to connect through the SOCKS5 proxy:```bashcurl --proxy socks5://your-vps-ip:1080 http://pyproxy.com```Replace `your-vps-ip` with your actual VPS IP address. If the connection is successful, you should be able to see the content of the webpage without any issues.5. Securing Your SOCKS5 Proxy ServerWhile socks5 proxies are secure by default, additional security measures are essential to prevent unauthorized access and abuse of your proxy server. Here are a few steps to secure your server:- Limit Access by IP Address: Restrict who can use the proxy by configuring IP-based access controls. Add the following lines to the Dante configuration file: ``` client pass { from: 192.168.1.0/24 to: 0.0.0.0/0 log: connect disconnect } ``` This rule allows connections from the local network (replace with your actual network range) while blocking others.- Firewall Configuration: Ensure that your VPS firewall is properly configured to allow only specific ports (e.g., port 1080 for SOCKS5). Use UFW to configure your firewall: ```bash sudo ufw allow 1080/tcp sudo ufw enable ```- Authentication: Consider implementing authentication methods to add an extra layer of protection. SOCKS5 supports user-based authentication to control who can access your proxy server.ConclusionSetting up a SOCKS5 proxy server on a cloud VPS provides you with a flexible, secure, and high-performance solution to enhance your online privacy, bypass geographical restrictions, and control your internet traffic. By following the steps outlined in this guide, you can easily install and configure a SOCKS5 proxy server, ensuring that your connection remains anonymous and secure. Remember to regularly monitor and update your proxy server to maintain optimal security. Whether for personal use or business purposes, hosting your own SOCKS5 proxy on a VPS gives you full control and peace of mind in your online activities.
Jan 13, 2025
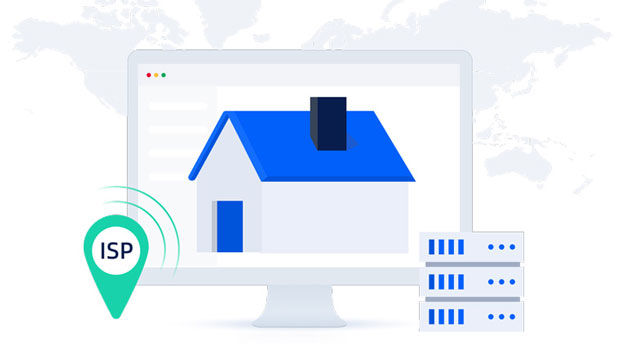
In today's digital world, online privacy and security are becoming increasingly important. Many users seek ways to mask their IP address, encrypt traffic, or access restricted content. One common and effective method for achieving this is by using a socks5 proxy tunnel through an SSH (Secure Shell) connection. This method allows users to route their internet traffic securely and privately by leveraging SSH as an encrypted channel. By using an SSH tunnel, users can bypass censorship, secure sensitive data, and maintain anonymity without the need for third-party proxy services. This article will guide you step-by-step on how to set up a SOCKS5 proxy using an SSH tunnel, the benefits of using this method, and how it works in practice. Understanding SSH Tunneling and socks5 proxiesBefore diving into the process of setting up a SOCKS5 proxy through an SSH tunnel, it is important to understand the two core concepts involved: SSH tunneling and SOCKS5 proxies.What is SSH Tunneling?SSH tunneling, also known as port forwarding, is a method of forwarding network traffic from one machine to another through an encrypted SSH connection. This is especially useful when accessing remote servers or resources securely over an insecure network, such as the public internet. By using SSH tunneling, the data is encrypted and routed through the SSH connection, ensuring that it is secure from eavesdropping or interception.What is SOCKS5 Proxy?SOCKS5 (Socket Secure version 5) is a protocol that allows clients to route network traffic through a proxy server. It operates at a lower level than HTTP or HTTPS proxies, meaning it can handle a variety of protocols and services, including web browsing, email, FTP, and P2P file sharing. SOCKS5 proxies are often favored for their ability to bypass geo-restrictions, anonymity, and faster speeds, as they do not alter or inspect the traffic in any way, unlike some other types of proxies.Why Use an SSH Tunnel for a SOCKS5 Proxy?There are several reasons why you might prefer using SSH tunneling to create a SOCKS5 proxy instead of relying on traditional proxy services:1. Enhanced Security: SSH encryption ensures that your internet traffic is secure. Any data passing through the SSH tunnel is protected, making it difficult for hackers or third parties to intercept or decrypt it.2. Privacy: When you use an SSH tunnel for SOCKS5, your actual IP address is hidden, as the traffic appears to originate from the remote server. This adds an additional layer of privacy for browsing and accessing services online.3. Bypassing Censorship: If you are in a location where internet access is restricted or censored, an SSH tunnel allows you to bypass firewalls and access the content you need, as the tunnel encrypts your traffic and makes it appear as if you are connecting from another location.4. No Need for Third-party Services: Unlike traditional proxy services that rely on external vendors, SSH tunneling allows you to set up your own tunnel, giving you more control and eliminating the need to trust third-party providers.5. Cost-effective: If you already have access to an SSH server, setting up a SOCKS5 proxy via SSH can be an affordable solution. It does not require you to subscribe to any paid proxy services.Steps to Set Up a SOCKS5 Proxy via SSH TunnelNow, let's go over the process of setting up a SOCKS5 proxy using an SSH tunnel. This setup can be done on various operating systems, including Linux, macOS, and Windows.1. PrerequisitesBefore you begin, you need a few things in place:- An SSH server: This can be a remote server that you control or one that you have SSH access to. You’ll need the IP address, username, and SSH credentials (password or private key) for authentication.- SSH client software: Make sure you have SSH client software installed. Linux and macOS usually have built-in SSH clients. For Windows, you can use software like PuTTY or the Windows Subsystem for Linux (WSL).- A SOCKS5-compatible application: This can be any application that allows you to configure a proxy server, such as a web browser or torrent client.2. Creating the SSH TunnelLinux/macOS Instructions:Open your terminal and use the following SSH command to create the tunnel:```bashssh -D 1080 -f -C -q -N user@remote-server-ip```- -D 1080: Specifies the local port (1080 in this case) on which the SOCKS5 proxy will listen.- -f: Requests SSH to go to the background just before the command is executed.- -C: Enables compression, which can improve performance in some cases.- -q: Reduces the verbosity of the output.- -N: Tells SSH not to execute any commands on the remote server.Once the tunnel is set up, your local machine will have a SOCKS5 proxy running on port 1080.Windows Instructions (using PuTTY):1. Open PuTTY and enter the SSH server's IP address.2. In the left panel, navigate to Connection > SSH > Tunnels.3. Under "Source port," enter `1080` (or another unused port).4. Select Dynamic for the "Destination" option and click "Add."5. Go back to the Session panel and click Open to establish the connection.Now your SSH tunnel is set up, and the SOCKS5 proxy is ready to use.3. Configuring Applications to Use the SOCKS5 ProxyAfter the SSH tunnel is active, you need to configure your applications to use the SOCKS5 proxy. This step is different depending on the software you're using. For example, in a web browser:- Firefox: Go to Preferences > Network Settings > Settings, and choose Manual proxy configuration. Set the SOCKS host to `localhost` and the port to `1080`.- Google Chrome: Chrome uses the system's proxy settings. You may need to configure the system's network settings to use `localhost:1080` as the SOCKS5 proxy.4. Testing the ConnectionTo confirm that your traffic is being routed through the SOCKS5 proxy, visit a website like "WhatIsMyIP" to check if your IP address has changed. If the setup is correct, it should show the IP address of the SSH server instead of your own.Possible TroubleshootingWhile setting up an SSH tunnel for SOCKS5 is usually straightforward, there can be issues that arise:- Firewall Issues: Ensure that your SSH server is configured to allow incoming connections on port 22 and that no firewall blocks your connection.- Incorrect Proxy Settings: Double-check that the applications are properly configured to use the correct proxy settings (localhost and port 1080).- SSH Server Down: If your SSH server is unavailable, the SOCKS5 proxy will not work. Ensure that the SSH server is running and accessible.ConclusionUsing an SSH tunnel to create a SOCKS5 proxy is a simple yet effective way to secure your online activities, ensure privacy, and bypass restrictions. By leveraging SSH encryption, you not only safeguard your data but also maintain control over your internet traffic without relying on third-party services. Although the setup process requires some technical know-how, the benefits of using an SSH-based SOCKS5 proxy are substantial. Whether you're looking to improve security, enhance privacy, or circumvent censorship, this method provides a reliable and free solution.
Jan 13, 2025
Setting up a socks5 proxy server from scratch can seem daunting for beginners, but with the right tools and guidance, it is an achievable task. This guide provides a step-by-step approach to help you understand what SOCKS5 is, why it’s useful, and how to configure it on your own server. socks5 proxies offer enhanced security, privacy, and versatility compared to other proxy protocols, making them ideal for use in various scenarios such as bypassing geo-restrictions, improving anonymity, or securely routing traffic. By following this guide, you will learn the necessary steps to create a fully functional socks5 proxy server, even if you are new to networking and server administration. What is a SOCKS5 Proxy?SOCKS5 (Socket Secure version 5) is an internet protocol that facilitates routing network packets between a client and server through a proxy server. It supports a variety of internet protocols such as HTTP, FTP, and SMTP, and it allows data to be transmitted securely. One of its primary features is its ability to handle any type of traffic—TCP, UDP, and even IPv6—which makes it more flexible than traditional proxies like HTTP or HTTPS.SOCKS5 proxies offer numerous advantages over other proxy protocols. They provide enhanced privacy by masking your IP address, offer greater security by encrypting traffic, and ensure more reliable performance by supporting a wider range of protocols. Setting up a SOCKS5 proxy server can thus improve your online experience by safeguarding sensitive data, avoiding censorship, and providing more control over your internet traffic.Why Set Up a SOCKS5 Proxy Server?There are several reasons why someone may want to set up their own SOCKS5 proxy server:1. Enhanced Privacy and Anonymity: By masking your IP address, a SOCKS5 proxy server adds a layer of anonymity to your online activities. This is particularly beneficial when browsing the internet or using applications that require high levels of privacy.2. Bypass Geo-restrictions and Censorship: SOCKS5 proxies allow users to route traffic through servers located in different regions. This capability is ideal for accessing geo-blocked content or bypassing government censorship.3. Improved Security: A SOCKS5 proxy can encrypt your traffic, providing an additional level of security, especially when using unsecured networks such as public Wi-Fi.4. Better Control: Running your own proxy server gives you complete control over the configuration, making it easier to adjust settings according to your specific needs.Prerequisites for Setting Up a SOCKS5 Proxy ServerBefore you start setting up a SOCKS5 proxy server, you need a few prerequisites:1. A VPS or Dedicated Server: You need a remote server to host your SOCKS5 proxy. This can be a Virtual Private Server (VPS) or a dedicated machine. The server should be running a Linux-based operating system such as Ubuntu, CentOS, or Debian.2. Basic Knowledge of the Command Line: Since setting up a SOCKS5 proxy server involves using the terminal, a basic understanding of Linux commands will be necessary.3. Root Access: You will need root (administrator) access to the server to install software and configure the necessary services.4. Secure SSH Access: You should be familiar with SSH (Secure Shell) to access your server remotely. SSH is essential for securing communication between your local machine and the server.Step-by-Step Guide to Setting Up SOCKS5 Proxy ServerNow that you have the necessary prerequisites in place, let's dive into the steps required to set up your own SOCKS5 proxy server.Step 1: Connect to Your ServerTo begin, log in to your VPS or dedicated server via SSH. Use a terminal program (such as PuTTY on Windows or Terminal on macOS/Linux) and connect to your server by typing:```ssh root@your-server-ip```Replace "your-server-ip" with the actual IP address of your server. You’ll need to enter the root password for authentication.Step 2: Install the Necessary SoftwareNext, you need to install the software that will enable your server to function as a SOCKS5 proxy. One of the most popular and lightweight options is `Dante`, a free and open-source SOCKS server. To install Dante on a Debian-based system (like Ubuntu), run the following command:```apt updateapt install dante-server```For CentOS-based systems, use:```yum install dante-server```This will download and install Dante on your server.Step 3: Configure the SOCKS5 Proxy ServerAfter installing the necessary software, you need to configure the SOCKS5 proxy. The configuration file for Dante is usually located at `/etc/danted.conf`. To edit this file, run:```nano /etc/danted.conf```Inside the configuration file, you will need to specify several key parameters:- Listening Port: The port on which the SOCKS5 proxy will listen for incoming connections. By default, SOCKS5 proxies use port 1080.- Network Access Control: Define which IP addresses or networks are allowed to connect to the server. For instance, if you want to allow all IPs, you can set it to `0.0.0.0/0`.- Authentication: If you want to use username and password authentication for added security, you can configure this here.Here’s a basic configuration example:```logoutput: /var/log/danted.loginternal: eth0 port = 1080external: eth0method: username noneuser.notprivileged: nobodyclient pass { from: 0.0.0.0/0 to: 0.0.0.0/0 log: error}```This configuration sets up the proxy to listen on port 1080 and allows connections from any IP address.Step 4: Start the SOCKS5 Proxy ServerAfter configuring the proxy, save the changes and exit the editor. To start the SOCKS5 server, run the following command:```systemctl start danted```You can also enable it to start automatically on boot:```systemctl enable danted```To verify that the server is running, use:```systemctl status danted```If the server is running without issues, you can now connect to your SOCKS5 proxy.Step 5: Test the SOCKS5 ProxyTo test whether your SOCKS5 proxy is working properly, configure your local browser or application to use the server’s IP address and the SOCKS5 port (typically 1080). You should be able to route traffic through the proxy.For example, in a browser like Firefox, go to the settings, find the "Network Settings," and input your proxy details:- SOCKS Host: your-server-ip- Port: 1080- SOCKS Version: SOCKS5Then, browse the internet. If the connection works without issues, your SOCKS5 proxy server is up and running.Step 6: Securing the SOCKS5 Proxy ServerSecurity is a critical aspect of running a SOCKS5 proxy server. Here are a few tips to improve the security of your server:1. Use Strong Passwords: If you enable authentication, ensure that you use strong passwords for all users.2. Firewall Configuration: Use a firewall to restrict access to your proxy server from unauthorized IPs.3. Monitor Logs: Regularly monitor the proxy server logs for suspicious activity.ConclusionSetting up a SOCKS5 proxy server from scratch can be a rewarding project for anyone looking to improve their internet privacy, bypass restrictions, or enhance their security. By following the steps outlined in this guide, you can have your own SOCKS5 proxy server up and running in no time. However, remember that while the setup is relatively simple, managing and securing your proxy server is an ongoing responsibility that requires attention and care.
Jan 13, 2025
When setting up a socks5 proxy server, encountering setup failures is a common problem. The failure to properly configure the server can result in loss of connection, slow speeds, or complete failure to route traffic. Understanding the reasons behind these issues and knowing how to troubleshoot them is crucial for resolving the problem effectively. This article will provide an in-depth look at the common causes for Socks5 proxy setup failure and how to troubleshoot each one methodically. By following the outlined steps, users can efficiently address the problems and restore the proper functionality of the proxy server. Understanding Socks5 Proxy and Common Setup IssuesSocks5 is a protocol for routing network traffic through a proxy server. It acts as an intermediary between a user and the internet, allowing for enhanced privacy, access control, and bypassing certain geo-restrictions. However, setting up a socks5 proxy server involves a number of technical configurations, and errors during setup can lead to various problems. These issues might range from simple misconfigurations to more complex network-related problems. Identifying the root cause is crucial to ensuring smooth operation.Common issues include incorrect IP or port configurations, authentication failures, and firewall restrictions. Additionally, problems with DNS resolution, server overload, and software conflicts can also lead to Socks5 proxy failures. To address these issues effectively, it's important to approach troubleshooting systematically.Step 1: Verifying the Proxy Server DetailsThe first and most basic step in troubleshooting any proxy-related issues is to ensure that the proxy server details are correctly entered. A small typo in the IP address or port number can cause a failure in connecting to the Socks5 server. Therefore, double-check the following:- Server IP Address: Ensure that the IP address of the proxy server is correct and accessible.- Port Number: Verify that the correct Socks5 port is being used. Common Socks5 ports are 1080 and 1081, but this can vary depending on the setup.- Authentication: If your Socks5 proxy requires a username and password, make sure these credentials are entered correctly.It's also recommended to test the connection to the server using tools like `ping` or `telnet` to ensure the server is reachable. A failure to reach the server might indicate an issue with the server itself or a network-related problem.Step 2: Checking for Firewall and Network RestrictionsNetwork firewalls and security settings are a common cause of Socks5 setup failures. Firewalls may block the connection to the Socks5 server if they are not properly configured. It’s important to ensure that the required ports for Socks5 (typically port 1080) are open in both the local and server-side firewalls.Steps to troubleshoot firewall issues include:- Local Firewall: Check your system’s firewall settings to ensure that outgoing connections to the proxy server’s port are allowed.- Server Firewall: If you're hosting the Socks5 server, ensure that the server’s firewall allows incoming connections on the required port.- ISP Restrictions: Some ISPs block proxy ports. To determine if this is the case, try using a different port or contact your ISP for clarification.If you're using a VPN in conjunction with your Socks5 proxy, ensure that the VPN's settings are not interfering with the proxy server's traffic. Some VPNs may block or restrict proxy usage, so it's essential to confirm compatibility between the VPN and proxy settings.Step 3: Ensuring Proper DNS ConfigurationDNS (Domain Name System) issues can also cause Socks5 proxy setup failures, particularly if the DNS server does not resolve addresses correctly. The proxy may fail to connect to websites or services if the DNS settings are not properly configured.To troubleshoot DNS problems:- Test DNS Resolution: Try resolving domain names using `nslookup` or `dig` commands to check if DNS queries are being resolved.- Change DNS Servers: If the default DNS servers are unreliable, consider using a public DNS service like Google DNS or OpenDNS.- Check for DNS Leaks: In some cases, DNS leaks can occur, allowing your real DNS to bypass the proxy. This can be verified using a DNS leak test tool.Correct DNS resolution is critical to ensure that traffic routed through the Socks5 proxy reaches the intended destination without errors.Step 4: Testing with a Different Client or ApplicationSometimes the issue lies with the specific client or application you're using to configure the Socks5 proxy. If you've configured the proxy correctly, but the application still fails to connect, the issue could be with the client software itself.Steps to diagnose client-specific issues:- Test with Another Client: Try setting up the Socks5 proxy on a different application or device to see if the issue persists.- Update Software: Ensure that the client application and all related software are up-to-date. Older versions may contain bugs that prevent proper proxy configuration.- Check Proxy Settings in the Client: Verify that the proxy settings within the application are correct and are specifically set to use Socks5. Some applications may support multiple proxy protocols (HTTP, HTTPS, SOCKS4, Socks5), so it’s essential to ensure that Socks5 is selected.Testing with different clients can help rule out application-specific issues and narrow down the potential causes of the setup failure.Step 5: Server-Side TroubleshootingIf you've verified the client-side configuration and network settings but are still encountering issues, it's time to focus on the server-side. The proxy server itself could be misconfigured, overloaded, or experiencing internal errors.Things to check on the server side include:- Server Load: If the server is overloaded or facing performance issues, it might reject new connections. Check the server's CPU and memory usage to ensure it's not under heavy load.- Logs: Review the server logs for any error messages that may indicate why connections are being refused or dropped.- Reboot Server: Sometimes, simply restarting the server can resolve temporary issues related to resource allocation or network connectivity.If you're managing the Socks5 server, ensure that it is properly configured and updated to the latest version. If you're using a third-party provider, contact their support team for assistance.Step 6: Re-evaluating the Proxy SetupIf the problem persists even after performing all the troubleshooting steps, it may be necessary to re-evaluate the entire proxy setup. This includes ensuring that you're using the correct type of proxy for your needs and that there are no configuration errors.Consider these actions:- Reconfigure the Proxy: Double-check all settings and configuration steps to ensure that nothing has been missed or set incorrectly.- Switch to a Different Proxy Protocol: If Socks5 continues to be problematic, consider testing another protocol, such as HTTP or HTTPS proxies, to see if they provide better results.- Consider Alternative Setup Methods: In some cases, using a different method to route traffic (e.g., using a VPN or alternative proxy software) may resolve the issue.Reassessing the entire setup allows you to confirm whether Socks5 is the right choice or if other solutions may better suit your needs.ConclusionTroubleshooting a Socks5 proxy setup failure involves a systematic approach to verifying configurations, checking network settings, and addressing potential issues on both the client and server sides. By following these troubleshooting steps, users can quickly diagnose the root causes of connection failures and restore functionality. Whether it’s a misconfiguration, firewall issue, DNS problem, or server-side error, addressing each potential cause with careful analysis and testing can lead to a smooth and successful Socks5 proxy setup.
Jan 13, 2025