Your form has been submitted. We'll contact you in 24 hours.
Close
Home/Blog/How to integrate PyProxy residential proxies into Python scripts?
How to integrate PyProxy residential proxies into Python scripts?
PYPROXY·Aug 04, 2025
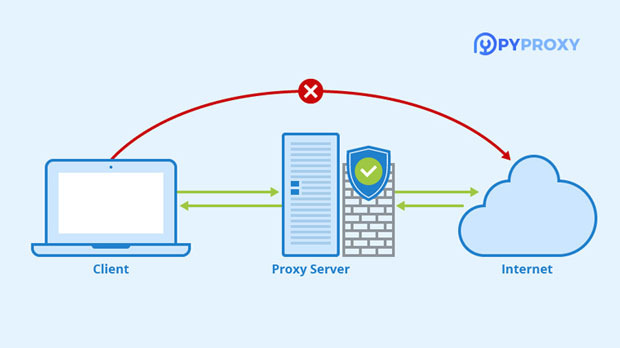
In today's digital landscape, proxies are an essential tool for enhancing privacy, improving security, and managing web scraping activities. residential proxies, in particular, offer the advantage of mimicking real user behavior, making them difficult to detect. PYPROXY is a Python library that allows easy integration of proxies into your Python scripts. This article will walk you through how to integrate residential proxies into your Python scripts using PyProxy, explaining the key concepts and steps in a detailed and structured manner, with practical insights for effective use. The article aims to provide real value for users looking to incorporate residential proxies into their Python-based projects.
Understanding Residential Proxies and PyProxy
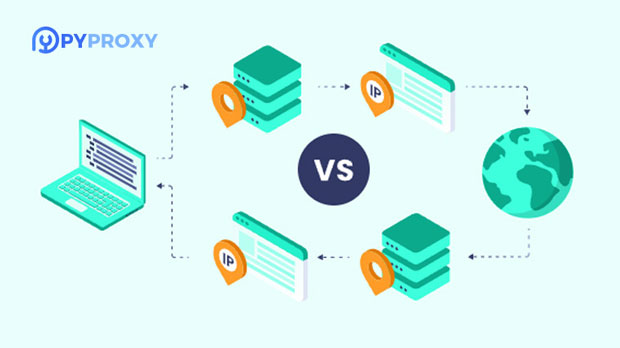
Before diving into integration, it's important to understand what residential proxies are and how PyProxy functions. Residential proxies are IP addresses provided by Internet Service Providers (ISPs) to real residential users, unlike data center proxies, which are generated by servers. These proxies are typically harder to detect, making them ideal for various applications such as web scraping, online security, and anonymity.
PyProxy is a Python library designed to handle proxy management, supporting different types of proxies, including residential proxies. It simplifies the process of integrating proxies into Python scripts, providing a clean and efficient way to route traffic through multiple proxies.
Prerequisites for Integration
Before you start integrating residential proxies using PyProxy, ensure you have the following:
1. Python Environment: Ensure you have a working Python environment (preferably Python 3.x).
2. PyProxy Installation: Install PyProxy using pip. The installation is straightforward and can be done via the terminal by running:
```bash
pip install pyproxy
```
3. residential proxy Subscription: You'll need access to a residential proxy service provider. Choose a provider that fits your needs in terms of geographic location, proxy rotation, and pricing.
4. Basic Python Knowledge: Familiarity with Python programming concepts such as libraries, functions, and network requests is essential for effective integration.
Step-by-Step Guide to Integrating Residential Proxies
Once the prerequisites are in place, you can begin integrating residential proxies with PyProxy. Here’s a step-by-step guide to help you through the process:
Step 1: Importing PyProxy
To start, you need to import PyProxy into your Python script. If PyProxy is installed correctly, you can import it as follows:
```python
from pyproxy import PyProxy
```
This allows you to access all the features and functions provided by PyProxy for managing your proxy settings.
Step 2: Configuring Residential Proxies
Next, configure your residential proxy by providing the necessary details such as proxy ip, port, and authentication (if required). You can set up a proxy configuration by specifying these parameters. Here’s an example:
```python
proxy = {
'ip': 'your.proxy.ip',
'port': 'proxy_port',
'username': 'your_username',
'password': 'your_password'
}
```
If you're using a provider that doesn't require authentication, you can skip the username and password.
Step 3: Setting Up Proxy in PyProxy
Now, initialize the PyProxy object with the residential proxy configuration. You’ll use this object to route your requests through the proxy. For example:
```python
proxy = PyProxy(proxy)
```
This creates a proxy object that is now ready to be used for your requests.
Step 4: Integrating with Web Requests
Once the proxy is set up, you can integrate it with web requests. PyProxy can be used with libraries like `requests` or `urllib` to make HTTP requests through the residential proxy.
Here’s an example of how to make an HTTP request using PyProxy with the `requests` library:
This sends a GET request to `pyproxy.com` using the residential proxy, ensuring that your IP address remains anonymous.
Step 5: Handling Proxy Rotation and Failover
One of the key benefits of using residential proxies is their ability to rotate IP addresses for each request, minimizing the chances of being detected. PyProxy supports proxy rotation, which can be particularly useful for web scraping or any task requiring multiple requests to different servers.
To enable proxy rotation, you can configure PyProxy to rotate through a list of proxies. This can be done by providing a list of proxies to the `PyProxy` object. Here’s how:
PyProxy will automatically handle the rotation for each new request, helping to distribute traffic across multiple residential IPs.
Step 6: Monitoring Proxy Usage and Performance
It’s important to monitor your proxy usage to ensure that your scripts are running efficiently. This can help you avoid any issues with bandwidth, latency, or blocked requests. PyProxy provides built-in tools to monitor proxy health and performance.
You can also log errors or failures if a proxy goes down or becomes unavailable. This will help you take action quickly and ensure that your script continues running smoothly.
Best Practices for Using Residential Proxies
To maximize the effectiveness of residential proxies, consider the following best practices:
1. Use Proxies from Trusted Providers: Ensure that you are using proxies from reputable providers to avoid using poor-quality proxies that may get blacklisted.
2. Implement Error Handling: Always implement error handling in your scripts to deal with potential proxy failures or connection issues.
3. Rotate Proxies Regularly: To avoid detection, make sure to rotate your proxies frequently, especially when making a high volume of requests.
4. Limit Request Frequency: Avoid making too many requests in a short period to reduce the chances of being detected as a bot.
5. Test Your Setup: Regularly test your setup to ensure that the proxies are functioning as expected and that you are receiving the expected results.
Conclusion
Integrating residential proxies into your Python scripts using PyProxy is a straightforward process that can enhance your privacy and improve your ability to scrape or interact with websites anonymously. By following the steps outlined in this article, you can efficiently set up residential proxies in your Python scripts, allowing you to handle web requests more securely and efficiently. Remember to follow best practices for optimal performance and avoid being detected by proxy-detecting systems.