Your form has been submitted. We'll contact you in 24 hours.
Close
Home/Blog/How to integrate Oxylabs proxy IP in Python project?
How to integrate Oxylabs proxy IP in Python project?
PYPROXY·Apr 08, 2025
When working on a Python project that requires handling large amounts of data from websites, web scraping, or maintaining anonymity, proxy ips are a crucial component. Proxies help by masking the real IP address, allowing for distributed requests to avoid detection and potential bans. In this article, we’ll explore how to effectively integrate proxy ips into a Python project. We’ll discuss the practical implementation, common challenges, and best practices for integrating proxies to ensure seamless operations and enhanced security for your project.
What Are Proxy IPs and Why Are They Important in Python Projects?
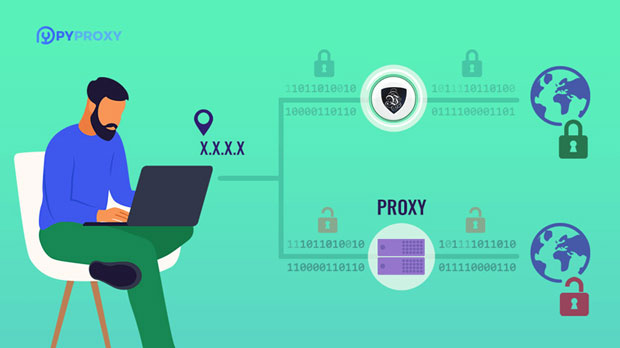
Proxy IPs serve as intermediaries between the client and the destination server. When a client makes a request to access data on a website, the proxy server handles this request and returns the data to the client. This provides a layer of anonymity as the website sees the IP of the proxy server, not the client’s actual IP.
For Python projects, particularly in fields like data scraping, automation, or even testing, proxy IPs are essential for several reasons:
- Avoiding Bans: When scraping a website, making multiple requests from the same IP address can result in temporary or permanent bans. Using proxies can rotate IP addresses, making it difficult for the website to detect and block the activity.
- Geolocation Testing: Some projects need data from different geographical regions. Proxies allow the simulation of requests from various locations, enabling access to region-specific data.
- Enhanced Privacy and Security: Proxies can also help protect the client’s IP from exposure, adding an extra layer of privacy and security.
Types of Proxies Suitable for Python Projects
Before diving into the integration process, it is important to understand the different types of proxies that can be used in Python projects. Proxies are typically classified into several types based on their characteristics and use cases.
- datacenter proxies: These proxies are hosted in data centers and offer fast speeds. They are commonly used for high-volume scraping tasks where the primary concern is speed rather than anonymity.
- residential proxies: These proxies are linked to real residential addresses, providing a more legitimate appearance to websites. They are typically used when anonymity and avoiding detection are the top priorities.
- rotating proxies: These proxies automatically rotate between different IP addresses, offering better protection against bans by preventing a single IP from making too many requests.
Integrating Proxy IPs into Python Projects
Now that we understand what proxies are and why they are necessary, let's dive into the steps for integrating proxy IPs into a Python project. There are several ways to configure proxies within your project depending on the complexity and requirements.
Step 1: Installing the Necessary Libraries
Before using proxy IPs, you’ll need to install the necessary Python libraries. The most common library for making HTTP requests in Python is `requests`. You can install it using the following pip command:
```bash
pip install requests
```
If your project involves web scraping, you may also be using libraries such as `BeautifulSoup` or `Scrapy`. These libraries can be used in combination with proxy IPs to handle HTML parsing and crawling tasks.
Step 2: Configuring Proxies for Requests
The easiest way to integrate proxies in a Python project is to configure them within the `requests` library. Proxies can be passed as a dictionary to the `proxies` parameter in the request function.
Here’s an PYPROXY of how to configure a proxy in a Python script using `requests`:
In this pyproxy, replace `your_proxy_ip` with the actual proxy ip address and `port` with the correct port number provided by your proxy service. This will route the HTTP and HTTPS requests through the designated proxy server.
Step 3: Using Authentication with Proxies
Some proxies may require authentication. If this is the case, you can pass the authentication credentials along with the proxy configuration.
Here’s an pyproxy of how to add authentication to your proxy configuration:
```python
import requests
from requests.auth import HTTPProxyAuth
Define the proxy server details
proxies = {
'http': 'http://your_proxy_ip:port',
'https': 'https://your_proxy_ip:port',
}
Define the authentication credentials
auth = HTTPProxyAuth('username', 'password')
Make a request through the proxy with authentication
This method is useful for proxies that require a username and password for authentication.
Step 4: Handling Proxy Rotation
In many cases, especially when dealing with large-scale web scraping projects, proxy rotation becomes necessary. Rotating proxies will automatically change the IP address for each request, preventing your activities from being detected or blocked.
To handle proxy rotation, you can create a list of proxies and select a random one for each request. Below is an pyproxy using Python's `random` module:
This method ensures that the proxy IP address rotates with each request, thus reducing the chances of detection.
Step 5: Error Handling and Retrying Failed Requests
When using proxies, you may encounter errors such as timeouts, connection issues, or proxy failures. It’s crucial to have error handling in place to retry failed requests with a different proxy.
Here’s an pyproxy of how to implement error handling and retry logic:
This function attempts to make a request up to five times before giving up, ensuring that the project can handle intermittent proxy failures.
Best Practices for Using Proxy IPs in Python Projects
When using proxy IPs in Python projects, consider the following best practices to ensure efficient and reliable operation:
1. Monitor Proxy Health: Regularly check the status of proxies to avoid using dead or slow proxies. Some proxy services provide health monitoring tools to help with this.
2. Respect Target Website Policies: Always ensure that your use of proxies complies with the terms of service of the websites you are interacting with.
3. Rotate Proxies Regularly: For larger projects, proxy rotation is essential. Regularly rotating proxies reduces the chances of being blocked.
4. Use Secure Proxies: Ensure that the proxies you use support HTTPS to encrypt your traffic, adding a layer of security to your operations.
Integrating proxy IPs into your Python project is essential for ensuring privacy, avoiding bans, and managing large-scale data extraction tasks effectively. By following the steps outlined above—installing necessary libraries, configuring proxies, handling authentication, implementing proxy rotation, and applying error handling—you can optimize the integration of proxy IPs into your project. This not only enhances your project's performance but also provides a secure and scalable approach to web scraping and automation.