Your form has been submitted. We'll contact you in 24 hours.
Close
Home/Blog/How to fix DNS server not responding issue encountered on Mac?
How to fix DNS server not responding issue encountered on Mac?
PYPROXY·May 09, 2025
Experiencing the "DNS server not responding" error on a Mac can be frustrating, especially when you need to browse the web or access critical services. This error occurs when your computer cannot connect to the DNS server, which is responsible for translating domain names into IP addresses. The root cause can range from network issues to incorrect settings or problems with your Internet Service Provider (ISP). Fortunately, several troubleshooting steps can help resolve this issue. In this article, we will explore the different ways to fix the DNS server not responding issue on your Mac, ensuring a smooth and uninterrupted internet experience.
What is DNS and How Does It Affect Your Mac?
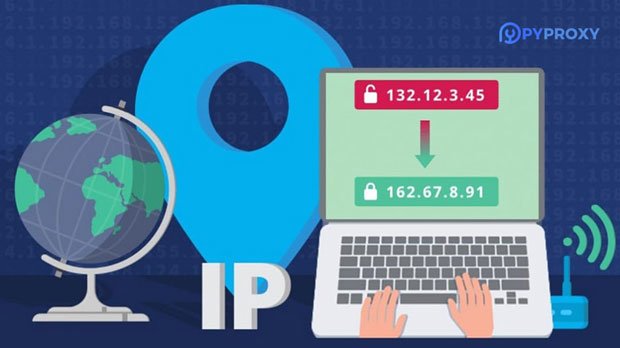
Before diving into the solutions, it’s important to understand what DNS is and how it functions in the context of internet browsing. DNS (Domain Name System) is like the phone book of the internet. It translates human-readable domain names (like www.example.com) into IP addresses (such as 192.168.1.1) that computers can understand. Without DNS, you would need to remember complex numerical IP addresses for every website you visit, which is both impractical and cumbersome.
When you encounter the "DNS server not responding" error, your Mac is essentially unable to communicate with the server responsible for resolving these addresses. This can prevent websites from loading, emails from being received, and apps from connecting to their servers, leaving your internet experience disrupted.
Step-by-Step Solutions to Fix the DNS Server Not Responding Issue on Mac
Now that we understand the issue, let’s explore some practical steps to resolve the "DNS server not responding" error on your Mac.
1. Check Your Internet Connection
Sometimes, the problem may simply be that your internet connection is down. Before diving into more advanced troubleshooting steps, it’s essential to confirm that your Mac is properly connected to the internet.
- Check Wi-Fi or Ethernet: If you're using Wi-Fi, ensure that your Mac is connected to the correct network. If you're using an Ethernet cable, check if the cable is securely connected.
- Test Other Devices: If other devices (like your phone or another computer) are also unable to connect to the internet, this may indicate a larger network issue that needs to be addressed with your ISP.
- Restart Your Modem/Router: If there’s no internet connection on any device, restart your modem or router. This can often resolve temporary connectivity issues.
2. Restart Your Mac
A simple restart can sometimes clear out minor glitches, including issues related to DNS servers. Restarting your Mac can refresh your network connections and re-establish proper communication with the DNS server.
- How to Restart Your Mac: Click on the Apple icon at the top left of your screen and select "Restart." Once your Mac restarts, check if the problem persists.
3. Clear the DNS Cache on Your Mac
Sometimes, your Mac’s DNS cache may become corrupted or outdated, causing issues when trying to resolve domain names. Clearing the DNS cache can help fix this problem.
- Steps to Clear DNS Cache:
1. Open the Terminal app (you can find it by using Spotlight search).
2. Type the following command:
`sudo killall -HUP mDNSResponder`
3. Press Enter and enter your password when prompted.
4. Close Terminal and check if the DNS issue is resolved.
4. Change Your DNS Server Settings
If your current DNS server is unresponsive, changing the DNS settings on your Mac can help bypass the issue. You can switch to public DNS servers provided by companies like Google, OpenDNS, or Cloudflare, which are known for their reliability and speed.
- How to Change DNS Server on Mac:
1. Open System Preferences from the Apple menu.
2. Click on Network.
3. Select your active network connection (Wi-Fi or Ethernet) and click Advanced.
4. Go to the DNS tab.
5. Click the + button to add a new DNS server. Here are some public DNS server addresses:
- Google DNS: 8.8.8.8 and 8.8.4.4
- OpenDNS: 208.67.222.222 and 208.67.220.220
- Cloudflare: 1.1.1.1 and 1.0.0.1
6. Click OK, then Apply.
After updating the DNS servers, check if your Mac can connect to websites without issues.
5. Disable IPv6
In some cases, IPv6 settings can interfere with DNS resolution, leading to connectivity issues. Disabling IPv6 may help resolve the "DNS server not responding" error.
- Steps to Disable IPv6:
1. Open System Preferences and go to Network.
2. Select your active network connection and click Advanced.
3. Go to the TCP/IP tab.
4. Change the Configure IPv6 option to Off.
5. Click OK, then Apply.
6. Check for DNS Server Issues with Your ISP
If you’ve tried the above steps and are still facing the "DNS server not responding" error, the issue might lie with your Internet Service Provider (ISP). Some ISPs may experience temporary outages or issues with their DNS servers, which can affect your ability to connect to websites.
- Contact Your ISP: Reach out to your ISP’s customer support to ask if there are any ongoing issues with their DNS servers. If necessary, request that they provide an alternative DNS server for you to use.
7. Update Your Mac’s Software
Outdated software can sometimes cause compatibility issues, including problems with DNS resolution. Make sure your Mac is running the latest version of macOS, as software updates often include bug fixes for network-related issues.
- Steps to Update macOS:
1. Click the Apple menu and select System Preferences.
2. Choose Software Update.
3. If an update is available, follow the prompts to download and install it.
8. Reset Network Settings
If all else fails, you may need to reset your Mac’s network settings. This can resolve issues caused by incorrect configurations or network-related bugs. However, note that this will erase all your saved Wi-Fi passwords and network settings, so you’ll need to reconnect to your networks afterward.
- How to Reset Network Settings:
1. Open System Preferences and go to Network.
2. Select your active network connection and click the minus (-) button to remove it.
3. Re-add the network connection by clicking the plus (+) button and following the setup prompts.
The "DNS server not responding" error on Mac can be a frustrating issue, but with the right troubleshooting steps, you can quickly resolve it and get back to a smooth internet experience. Start by checking your internet connection and restarting your Mac, then move on to more advanced solutions like clearing the DNS cache, changing DNS servers, or updating your macOS. If none of these steps work, contacting your ISP or resetting your network settings should resolve the issue. By following this guide, you’ll be able to fix DNS problems on your Mac and enjoy uninterrupted browsing once again.