Your form has been submitted. We'll contact you in 24 hours.
Close
Home/Blog/How to configure SOCKS5 proxy in Chrome using FoxyProxy?
How to configure SOCKS5 proxy in Chrome using FoxyProxy?
PYPROXY·Jun 19, 2025
In today's digital world, privacy and security have become increasingly important. One of the easiest ways to enhance both is by using a proxy server. sock s5 proxies, in particular, are known for their flexibility and security features. Setting up a socks5 proxy in Chrome can help protect your online identity and bypass geographical restrictions. FoxyProxy is a popular extension for Google Chrome that makes it easy to configure and manage proxies. In this article, we will provide a step-by-step guide to configuring a SOCKS5 proxy using FoxyProxy in Chrome. We will cover everything from installation to configuration, ensuring you can surf the web securely and anonymously.
Understanding SOCKS5 Proxy
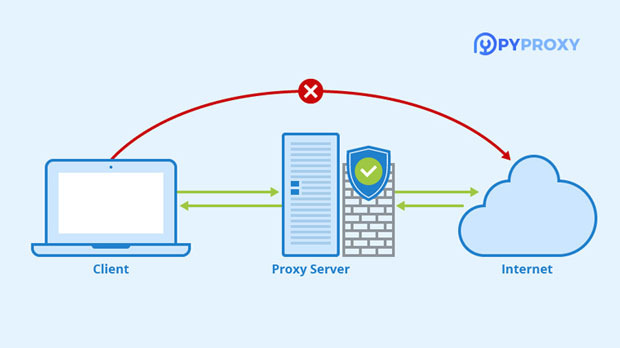
Before diving into the process of setting up a SOCKS5 proxy in Chrome, it's essential to understand what a SOCKS5 proxy is and how it functions. A SOCKS5 proxy is an internet protocol that relays data between the client and the server without revealing the user's real IP address. It operates at a lower level than HTTP proxies, offering more flexibility. SOCKS5 allows for various types of traffic, including FTP, SMTP, and P2P, making it versatile and suitable for many different use cases.
Unlike HTTPS proxies, SOCKS5 proxies do not alter your internet traffic. This means they don’t interfere with the data packets, making them a more secure and private option. For Chrome users, setting up a SOCKS5 proxy with FoxyProxy can make your browsing sessions more anonymous and protected.
Why Use FoxyProxy for SOCKS5 in Chrome?
FoxyProxy is a highly recommended tool for configuring proxies in Google Chrome. It offers a range of benefits for users who want to manage multiple proxies effectively. Here are some key reasons why FoxyProxy is a great choice:
1. Easy Configuration: Setting up a SOCKS5 proxy in Chrome can be complicated without the right tools. FoxyProxy simplifies this process by providing an intuitive interface that guides you through the configuration steps.
2. Multiple Proxy Management: FoxyProxy allows users to configure and switch between multiple proxies effortlessly. This feature is particularly useful for users who require different proxies for different tasks.
3. Security Features: With the increasing number of cyber threats, using a reliable proxy like SOCKS5 combined with FoxyProxy ensures an extra layer of security while browsing the web.
4. Bypass Geo-Restrictions: By using a SOCKS5 proxy, you can access websites that may be restricted in certain regions. FoxyProxy makes it easy to switch between different proxy servers to bypass these geographical limitations.
How to Install FoxyProxy in Chrome
Before you can configure your SOCKS5 proxy, you need to install FoxyProxy in your Chrome browser. Here's how you can do it:
1. Open Chrome: Launch your Google Chrome browser.
2. Visit the Chrome Web Store: Go to the Chrome Web Store and search for "FoxyProxy."
3. Add to Chrome: Once you find the FoxyProxy extension, click on "Add to Chrome" to install it.
4. Confirm Installation: After the extension is installed, you will see the FoxyProxy icon in the top-right corner of your browser.
How to Configure SOCKS5 Proxy in FoxyProxy
Once FoxyProxy is installed, you can proceed to configure the SOCKS5 proxy. Here is a detailed guide on how to do it:
1. Open FoxyProxy: Click on the FoxyProxy icon in the top-right corner of Chrome. A menu will appear.
2. Select "Options": From the drop-down menu, click on "Options." This will open the FoxyProxy configuration page.
3. Add a New Proxy: On the configuration page, click on "Add New Proxy" or "Add Proxy" (depending on the version).
4. Enter Proxy Information:
- Proxy Type: Select "SOCKS5" from the list of available proxy types.
- Proxy Address: Enter the SOCKS5 server's address. This can typically be found in the proxy provider's settings.
- Port: Enter the port number for the SOCKS5 proxy. The default is often 1080, but this may vary based on your proxy provider.
- Authentication: If your SOCKS5 proxy requires authentication, enable "Username" and "Password" fields and enter the credentials.
5. Save Configuration: After entering the necessary information, click "Save" or "OK" to confirm your settings.
How to Activate and Switch Between Proxies in FoxyProxy
After configuring your SOCKS5 proxy, you can switch between different proxy settings as needed. Here’s how to activate and manage your proxies in FoxyProxy:
1. Open FoxyProxy Menu: Click on the FoxyProxy icon again in the top-right corner of your browser.
2. Select Proxy Mode: You will see a list of available proxy modes. Choose the one you just configured (e.g., SOCKS5).
3. Enable Proxy: Once selected, the SOCKS5 proxy will be activated, and your internet traffic will be routed through the proxy server.
You can also use the "Patterns" feature in FoxyProxy to route specific websites through different proxies based on the URL.
Additional Tips for Using SOCKS5 Proxy with FoxyProxy
1. Use Auto-Switching: If you need to switch between different proxies regularly, FoxyProxy can automate the process using URL patterns. This is especially useful if you need different proxies for different websites or services.
2. Monitor Proxy Status: FoxyProxy allows you to check the status of your proxies. If you notice slower speeds or connection issues, check to make sure the proxy is functioning properly.
3. Enhance Security with Encryption: Although SOCKS5 proxies offer good privacy, you can increase security by using a VPN in conjunction with your SOCKS5 proxy. This will encrypt your traffic and further protect your data.
Configuring a SOCKS5 proxy in Chrome using FoxyProxy is a simple and effective way to enhance your online privacy and security. With FoxyProxy’s intuitive interface and support for multiple proxies, you can easily manage your proxy settings and switch between them as needed. Whether you are looking to access geo-restricted content or simply want to browse the web more securely, this setup provides a powerful tool to achieve both goals. Follow the steps outlined in this guide to set up your SOCKS5 proxy today and enjoy a more private and secure browsing experience.