Your form has been submitted. We'll contact you in 24 hours.
Close
Home/Blog/How does the nginx proxy manager configure the SOCKS5 proxy?
How does the nginx proxy manager configure the SOCKS5 proxy?
PYPROXY·Jul 14, 2025
Configuring a socks5 proxy with Nginx Proxy Manager is an essential step in optimizing internet traffic for enhanced security and anonymity. SOCKS5 is a popular proxy protocol that allows users to route traffic securely through a server, masking their IP address. Nginx Proxy Manager offers a simple, user-friendly interface for managing proxies, making it an excellent choice for anyone seeking a secure and efficient proxy solution. In this article, we will walk you through the process of configuring a SOCKS5 proxy using Nginx Proxy Manager, providing detailed steps and best practices for a seamless experience.
What is SOCKS5 Proxy and Why Use Nginx Proxy Manager?
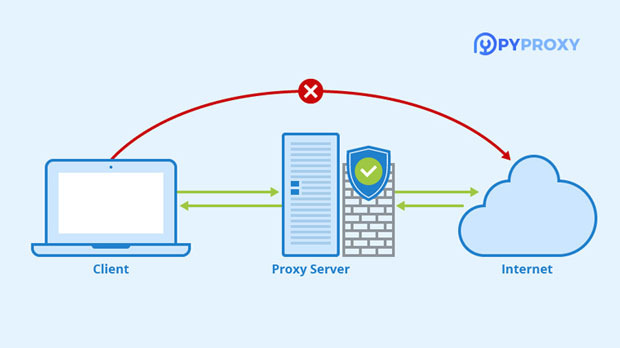
SOCKS5, or "Socket Secure" version 5, is a proxy protocol designed to route internet traffic through a server, providing users with enhanced privacy and security. Unlike other proxies, SOCKS5 allows for more types of traffic (such as UDP) to be proxied, making it versatile for different applications. This protocol is commonly used in situations requiring a higher level of anonymity, such as bypassing geo-restrictions, securing online communication, or masking the user’s IP address.
Nginx Proxy Manager simplifies the configuration and management of proxy servers, offering an intuitive web interface to handle complex proxy tasks with ease. This makes it an ideal tool for both beginners and experienced system administrators who need to manage their proxy setups efficiently.
Step 1: Setting Up Nginx Proxy Manager
Before configuring SOCKS5 proxy, you need to set up Nginx Proxy Manager. Here’s a simple process to get started:
1. Install Docker: Nginx Proxy Manager requires Docker for easy deployment. Install Docker on your server by following the official Docker installation guides for your specific operating system.
2. Deploy Nginx Proxy Manager: Once Docker is installed, you can deploy Nginx Proxy Manager using the following command:
```
docker-compose up -d
```
This command will pull the necessary Docker images and start the Nginx Proxy Manager.
3. Access Nginx Proxy Manager UI: After deployment, you can access the Nginx Proxy Manager web interface by navigating to the local IP address of your server on port 81 (e.g., `http://:81`). You will need to log in with the default credentials to start managing your proxies.
Step 2: Configuring SOCKS5 Proxy
Now that Nginx Proxy Manager is up and running, the next step is to configure the SOCKS5 proxy.
1. Create a New Proxy Host: In the Nginx Proxy Manager interface, navigate to the "Proxy Hosts" tab and click on the "Add Proxy Host" button.
2. Enter the Proxy Settings: You will need to input the following details:
- Domain Name: Enter the domain or IP address that will point to the socks5 proxy server.
- Scheme: Choose `HTTP` or `HTTPS` depending on the protocol you want to use for the proxy server.
- Forward Hostname / IP: Enter the IP address of the SOCKS5 proxy server.
- Forward Port: Enter the port number that corresponds to the SOCKS5 proxy server (typically 1080).
3. Configure SSL (Optional): If you want to secure your connection, you can enable SSL by adding an SSL certificate. This step is optional but recommended for ensuring secure communications.
4. Access Control Settings: Configure the access control settings to restrict which IP addresses or subnets can use the proxy. You can either allow or deny specific ranges of IP addresses.
5. Save the Configuration: Once you’ve entered all the necessary details, click "Save". This will add the SOCKS5 proxy configuration to your Nginx Proxy Manager.
Step 3: Verifying the Configuration
After setting up the SOCKS5 proxy, it is crucial to verify that the configuration is working as expected. Here’s how you can check:
1. Test the Proxy Server: Using a tool like `curl`, you can test the SOCKS5 proxy by routing your traffic through the proxy server. Run the following command:
Replace `` with the IP address of your SOCKS5 proxy. If everything is configured correctly, the request should be forwarded through the SOCKS5 proxy.
2. Check Logs for Errors: If the proxy doesn’t work as expected, check the logs in Nginx Proxy Manager for any errors related to the proxy configuration. You can access the logs from the "Logs" section in the interface.
3. Use a Browser Extension: You can also use a SOCKS5 proxy extension for browsers like Chrome or Firefox to test if the proxy setup is working.
Step 4: Advanced Configuration and Troubleshooting
While the basic configuration is simple, there are some advanced settings that you can tweak to improve performance or resolve issues:
1. Firewall Settings: Ensure that the firewall on your server allows traffic on the port used by the SOCKS5 proxy (usually 1080). You may need to adjust firewall rules to permit incoming and outgoing traffic on this port.
2. Network and Performance Tuning: To enhance the performance of the SOCKS5 proxy, consider adjusting network parameters such as timeout values, maximum connections, and buffer sizes.
3. Monitor Proxy Usage: Nginx Proxy Manager provides monitoring tools to track the usage of your proxy server. Use these tools to keep an eye on the performance and identify any bottlenecks or misuse.
4. Troubleshooting Tips:
- DNS Resolution: If DNS resolution issues occur, try enabling DNS proxy settings or manually configuring DNS servers.
- SSL Configuration: Ensure that the SSL certificates are correctly configured if you opted for secure communication.
- Authentication: If authentication is required for your SOCKS5 proxy, make sure to configure the username and password settings appropriately.
Conclusion
Configuring a SOCKS5 proxy with Nginx Proxy Manager is a straightforward process that provides excellent security and anonymity for users. With Nginx Proxy Manager’s user-friendly interface, managing your proxy configurations has never been easier. By following the steps outlined in this article, you can set up a reliable and secure SOCKS5 proxy to protect your internet traffic. Always ensure that your configuration is optimized for your specific use case, and regularly monitor performance to maintain an efficient proxy setup.