Your form has been submitted. We'll contact you in 24 hours.
Close
Home/Blog/How do you set up authentication for PyProxy’s SOCKS5 residential proxy?
How do you set up authentication for PyProxy’s SOCKS5 residential proxy?
PYPROXY·Aug 20, 2025
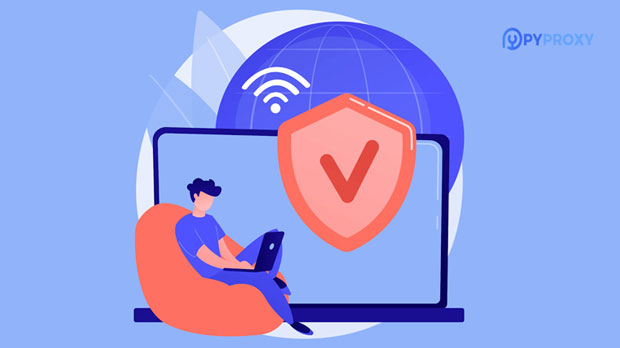
In this article, we will guide you through the steps to set up authentication for PYPROXY's SOCKS5 residential proxy. sock s5 proxies are highly regarded for their speed, flexibility, and ability to handle multiple protocols. With PyProxy’s SOCKS5 Residential Proxy, you can achieve seamless internet browsing with additional security through the authentication setup. Authentication helps ensure that only authorized users can access the proxy, enhancing both privacy and security.
What is PyProxy’s SOCKS5 Residential Proxy?
PyProxy’s SOCKS5 Residential Proxy is a high-performance proxy service that allows users to route their internet traffic through residential IPs. These proxies are provided by actual devices, as opposed to data center IPs, making them harder to detect and block by websites or services. SOCKS5, a widely used protocol for internet proxying, ensures compatibility with various types of traffic, such as HTTP, FTP, and even email protocols. It is also capable of supporting both IPv4 and IPv6 addresses, offering robust network capabilities.
residential proxies are particularly useful for tasks that require anonymity or location masking, such as web scraping, managing multiple accounts on social media, and accessing geo-restricted content. PyProxy’s implementation of SOCKS5 Residential Proxies adds an additional layer of security with authentication, which ensures only authorized users can access the proxy server.
Why Authentication Matters for SOCKS5 Residential Proxies
Authentication adds a critical layer of security to your proxy service. Without authentication, anyone with access to the proxy ip address can potentially use the proxy, leading to security risks, misuse, and bandwidth theft. By enabling authentication, you ensure that only trusted individuals or systems can use the proxy, making it safer for both private and professional use.
For businesses that use proxies for scraping, automation, or geo-location masking, it is essential to control who can access the proxy server. Authentication mechanisms can prevent unauthorized access, reduce the chance of IP blocks, and ensure that your proxy service remains private and secure.
How to Set Up Authentication for PyProxy’s SOCKS5 Residential Proxy
Setting up authentication for PyProxy’s SOCKS5 Residential Proxy is a straightforward process. The setup involves a few configuration steps in your proxy software or the Python client used to connect to the proxy.
Step 1: Log in to PyProxy Account and Access Proxy Settings
The first step to setting up authentication is to log in to your PyProxy account. Once logged in, you can navigate to the settings page for your SOCKS5 Residential Proxy. You will need to enable authentication for the proxy.
Step 2: Choose Authentication Method
There are typically two primary authentication methods available for SOCKS5 proxies: username and password authentication or IP address authentication.
- Username and Password Authentication: This method requires you to create a username and password combination that will be used when connecting to the proxy. This is the most common form of authentication and offers a good level of security, as only individuals with the correct credentials can use the proxy.
- IP Address Authentication: With this method, the proxy server will only accept connections from pre-configured IP addresses. This is more restrictive but can be an ideal solution for environments where only a set of devices or servers need proxy access.
Step 3: Configure Proxy Authentication Settings in PyProxy
Once you’ve chosen the appropriate authentication method, you can enter your credentials directly into the configuration file or settings page within the PyProxy dashboard. For username and password authentication, you’ll typically need to provide:
- Username: A unique identifier that will be used during the authentication process.
- Password: A secure password associated with the username.
For IP authentication, you’ll need to enter the list of IP addresses that are permitted to access the proxy.
Step 4: Test Proxy Connection with Authentication
Once the authentication is configured, you should test the connection to ensure that the setup works correctly. You can do this by using a simple proxy tester or your own Python code. If you’re using Python, you can utilize libraries like `requests` or `PySocks` to make sure that the proxy authentication is working as expected.
This Python code sets up a SOCKS5 proxy connection using the provided authentication credentials and sends a request to the specified URL to verify the proxy’s functionality.
Step 5: Secure Your Credentials
It’s critical to secure your authentication credentials. Never expose your username or password in plain text or in publicly accessible code repositories. Use environment variables or encrypted configuration files to store sensitive information securely.
Best Practices for Managing SOCKS5 Residential Proxy Authentication
While setting up authentication for your SOCKS5 Residential Proxy is essential, it is also important to maintain and manage your proxy credentials securely. Here are some best practices to follow:
1. Use Strong Passwords: Always opt for a strong and unique password for the authentication process. Avoid using easily guessable passwords, and consider implementing a password manager to keep track of your credentials securely.
2. Regularly Update Credentials: Periodically change your username and password to ensure that old credentials do not remain vulnerable. This also helps mitigate the risks associated with potential leaks.
3. Monitor Proxy Usage: Keep track of proxy access and usage to detect any unauthorized activity. Many proxy providers offer usage logs and monitoring tools to help track who is accessing your proxies.
4. Use IP Whitelisting: If your proxy provider offers IP address whitelisting, make sure to only allow trusted devices and servers to connect. This minimizes the chance of unauthorized access.
5. Two-Factor Authentication (2FA): For added security, enable two-factor authentication (2FA) for your PyProxy account to further protect access to your proxy settings and credentials.
Configuring authentication for PyProxy’s SOCKS5 Residential Proxy is an essential step in ensuring your proxy usage remains secure. Whether you choose username/password authentication or IP address authentication, implementing proper authentication safeguards your data and prevents unauthorized access to your proxy server. By following the steps outlined above and adhering to best practices, you can enjoy a secure, reliable, and private browsing experience.