Your form has been submitted. We'll contact you in 24 hours.
Close
Home/Blog/How do I write a script to automate the configuration of Oxylabs Proxy Extension?
How do I write a script to automate the configuration of Oxylabs Proxy Extension?
PYPROXY·Jun 06, 2025
Automating the configuration of proxy extensions like Oxylabs can save time and increase efficiency, especially when dealing with a large number of proxies. Whether for web scraping, SEO monitoring, or data analysis, automating the proxy setup ensures consistent performance and reduces manual errors. In this article, we’ll discuss how to write a script to automate the configuration of Oxylabs Proxy Extension, step by step, focusing on best practices and providing real-world solutions for effective implementation.
Understanding the Basics of Proxy Configuration
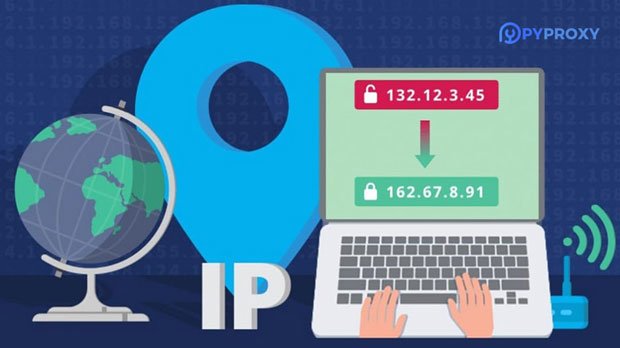
Before diving into scripting, it is crucial to understand how proxies work and the role of a proxy extension like Oxylabs. A proxy server acts as an intermediary between the user and the internet, masking the user’s IP address while making requests to websites. This is useful for tasks such as web scraping, accessing geo-restricted content, and maintaining anonymity. Proxy extensions such as Oxylabs simplify this process by integrating proxy configurations directly into the browser.
Why Automate Proxy Configuration?
Automating proxy configuration can be particularly beneficial in several scenarios:
1. Consistency: Manual configuration can lead to inconsistencies, where proxies may not be configured correctly across multiple sessions. A script ensures that the proxy setup is the same every time.
2. Efficiency: Automating the process allows you to scale proxy usage across many devices or users without requiring hands-on management.
3. Error Reduction: Automation reduces the chances of human error, ensuring that proxies are set up accurately each time.
4. Time-saving: Once the automation script is set up, it eliminates the need for manual configuration, which is especially valuable when dealing with large numbers of proxy setups.
Setting Up the Environment for Proxy Automation
Step 1: Install Necessary Tools
To begin automating Oxylabs Proxy Extension, you will need a few key tools:
1. Programming Language: Python is widely used for automation scripts due to its simplicity and power. Ensure you have Python installed on your system.
2. Selenium: Selenium is a powerful tool for automating web browsers. You can use it to control the browser, configure proxies, and interact with web elements.
3. Oxylabs Proxy Extension: You will need to download and install the Oxylabs Proxy Extension for the browser of your choice (typically Chrome or Firefox).
4. WebDriver: Selenium requires a WebDriver, which is a browser-specific driver that allows Selenium to interact with the browser.
Step 2: Set Up the Proxy Extension
In order to automate the configuration of Oxylabs Proxy Extension, the first step is to make sure the extension is installed and properly configured on the browser. The configuration usually involves specifying the proxy server address, port, and authentication credentials.
Writing the Automation Script
Step 3: Import Libraries and Configure Selenium
Now that the necessary tools are installed, let’s write the script to automate the configuration of the proxy extension.
```python
from selenium import webdriver
from selenium.webdriver.chrome.service import Service
from selenium.webdriver.common.by import By
from selenium.webdriver.chrome.options import Options
Set up Chrome options to include the proxy extension
chrome_options = Options()
chrome_options.add_extension('path_to_oxylabs_extension.crx') Specify the path to the Oxylabs extension
1. We import necessary libraries for working with Selenium and Chrome.
2. Set up Chrome options to include the Oxylabs proxy extension.
3. Initialize the WebDriver and open the browser’s extension page.
Step 4: Interact with the Extension to Input Proxy Details
Once the Oxylabs extension is loaded, we can interact with its configuration UI to input proxy details such as IP address, port, and authentication credentials.
```python
Find the elements to interact with the extension's proxy configuration fields
1. We use Selenium to find the elements of the Oxylabs Proxy Extension’s configuration UI.
2. We send the proxy details (such as IP, port, and credentials) to the appropriate fields.
3. Finally, we click the save button to apply the configuration.
Step 5: Testing the Proxy Configuration
To verify that the proxy has been correctly configured, you can visit a website that shows your IP address and check if it reflects the proxy ip instead of your original IP.
This code navigates to an IP-checking website and prints out the configured proxy IP, confirming whether the automation was successful.
Advanced Automation Techniques
Handling Multiple Proxies
If you need to configure multiple proxies, you can enhance your script by reading proxy details from a file or database and iterating through them to configure each one. This would allow you to scale the automation across different regions or tasks.
This allows you to automate the configuration of multiple proxies without manually entering each set of details.
Conclusion: Benefits and Practical Considerations
Writing a script to automate the configuration of Oxylabs Proxy Extension offers several advantages, including efficiency, error reduction, and scalability. By following the steps outlined in this article, you can create a robust automation solution for managing your proxy settings. Whether you are automating proxy configuration for web scraping, SEO tasks, or other use cases, this approach ensures smooth, error-free operation while saving you time and effort.
By leveraging automation, you can efficiently manage multiple proxies and scale your proxy usage without the need for manual intervention. The flexibility of scripting also allows you to customize the automation process based on your specific needs and use cases.